When I found this image from House Beautiful, I was inspired to look into getting mirror custom cut to fit a boxy and inexpensive dresser. That also turned out to be completely out of our price range (several hundred dollars for just the mirror for each dresser).

So, we were on to Plan C! I did a little googling and found some images of silver leafed furniture...


We both thought the silver leaf was a good alternative and decided to take the plunge. I found two bombay chests at HomeGoods that were on clearance for $75 because the paint was chipping. The size and shape were perfect for the room.

Once home, each dresser was lightly sanded over the chipped parts and then given a coat of chocolate brown paint (Ralph Lauren's 'Galvenized'). Once the paint had cured, I coated both dressers with 3-hour Quick Set Gilding Size, available here and at most art supply stores. I used about a pint between both dressers.

The gilding size acts as the glue that holds on the leaf. It's applied just like a varnish, and after waiting for a specified time, the size becomes tacky and is ready to be gilded.

There are many types of metal leaf. For this project, I used aluminum leaf because it was the brightest silver tone and looked the most to me like mirror (and the bonus is that aluminum is less expensive than silver leaf). A box of 500 5.5" x 5.5" sheets is $40-$50 and was more than enough for these two dressers.

As far as application of the leaf goes, the basic idea is to carefully lay the sheets down with as little folding of the leaf as possible. Then using a soft bristled paint brush, just tap, burnish and rub the leaf down. It gets really easy with practice - you'll feel like a pro after only 4 or 5 sheets.
Here are my best tips for gilding:
1. Do this project in the garage or outside if you are working on a large scale (like on furniture). The metal leaf bits get EVERYWHERE (which is a bonus if you are a four-year old obsessed with fairy dust)

2. Start with a flat, horizontal surface (like the dresser tops) to get the technique down before you attempt the vertical front or sides.
3. Once you've burnish one leaf sheet and are ready for the next, place that next sheet slightly on top of the already burnished leaf. By overlapping the sheets a little, there will be less of a gap/crack and the resulting look will be more seamless.
4. I ended up sort of liking the cracks and gaps in the gilding (it looks like antique mirror to me, with the chocolate brown base peeping through), but if you don't want to see the "imperfections" just use a bit of extra leaf and rub it into the gap or crack with your finger and the size will quickly pick up the leaf bits.

5. I was shocked at how resilient the gilded surface was after the size had fully dried. My client opted not to seal the finish because she wanted it to gently wear over time, but it would be easy to apply some Wipe On Poly to protect and seal the gilding.
The process looks more intimidating than it really is. While it's sort of time consuming, I was able to catch up on my tivo-ed shows while I gilded (do you spy my remote?).

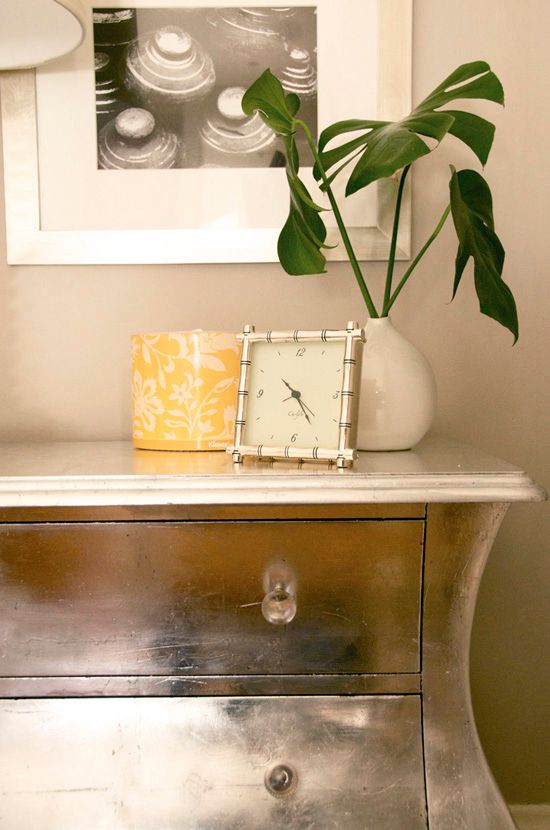
We used vintage lucite knobs from eBay as a final touch and I think that really moved these formally "Olde World" Homegoods dressers in the "Glam and Gorgeous" category.

Gorgeous results!
ReplyDeleteFantastic!! I love the final product. Now you have me wondering what I can leaf!
ReplyDeleteBeautiful job!!! Love those knobs!
ReplyDeleteHow inspiring. That looks amazing!
ReplyDeleteAwesome! I'm inspired!
ReplyDeleteAmazing! Why is mirrored furniture so dang expensive? I love the silver leaf look, so pretty!
ReplyDeleteGorgeous! I love that RL Galvanized color. I used it to paint my 1950s vanity in the bathroom, and it completely changed the room.
ReplyDeleteTotally impressed.
ReplyDeleteWow! That looks so great!
ReplyDeleteWow! Great job! Now, can you make me one too??
ReplyDeleteWOW!! That really does look awesome! I think it looks brighter and shinier than the silver, too. Awesome that it is a budget piece that looks totally expensive! Love that!
ReplyDeleteGorgeous! I like your end result better than the inspiration pics.
ReplyDeleteI was just talking to my husband about my obsession with mirrored furniture out of my budget...and VOILA! You have inspired me.
ReplyDeleteThank you so much!
Wow!! I've been waiting for this post ever since you showed the pictures - thanks!!
ReplyDeleteAnd congrats on your beautiful Evie!!!
What a cool project! I would have never thought to guild a dresser in a million years! Fabulous!!
ReplyDeleteSeriously? Your mad skills never cease to amaze me. I love the transformation. Just awesome!
ReplyDeleteThey look amazing! At a fraction of the cost of the 'real deal', too! Love them.
ReplyDeleteOn My To Do list for the new year.
ReplyDeleteWOW.
Why are you so flipping AWESOME??! I have read your blog forever and each time I am amazed at your talent. I also love reading how you write because it is as if you are speaking directly to me. I am obsessed with your blog - but not in a creepy, come find you way lol.
ReplyDeleteCongratulations on your delivery and new baby!
An avid fan and admirer,
Lisa D.
This is stunning. I am dying to give this a try myself.
ReplyDeleteThose look great and not too difficult! Thanks for sharing! Hope your enjoying your new little one!
ReplyDeleteWell, this inspires me to try again. I did a mirror years ago, and it was a disaster. I like seeing the whole process-- I can see where I made my mistakes (I'm a visual girl!). Beautiful-- but I don't know how you leaned over that belly to do all your leafing!
ReplyDeleteGorgeous! Thanks for sharing....I'm looking around for something to leaf!
ReplyDeleteI mean, this is seriously inspiring. I want to gild my whole living room now!!
ReplyDeleteThis is my first comment on your blog even though I've been following it for quite a while. I just had to let you know that this is the best DIY idea I've seen anywhere in recent history! Thanks so much for sharing! Huge congrats your recent addition, too!
ReplyDeletethose look intensely amazing.
ReplyDeleteYou are amazing! Love it! I did end up buying the Pier 1 mirrored nightstand on sale but still, it was more than I wanted to spend. These have such great character, great job!
ReplyDeleteThat is one amazing transformation!!! You are one clever cookie - please don't tell me you had time to did this after you had your gorgeous new bundle. Absolutely fantastic - a great job. Your client must be thrilled. Love your bog.......KG
ReplyDeleteWow, that is beautiful and so cool! Thanks for the tutorial!
ReplyDeleteThank you for explaining how you did it. Your directions make it seem easy!
ReplyDeleteso i have now decided to attempt this DIY....
ReplyDeleteits off to find the perfect piece.....
:)
thanks for the inspiration.
What a fantastic project this is! Thanks for the step by step. I've done gold leaf gilding before, but never on furniture. This is such a great look. I might have to find something I can do this on. Saving it to my Tumblr file for inspiration.
ReplyDeleteAwesome! I've been dying to have some mirrored nightstands. I am going to try this for my bedroom.
ReplyDeleteJenny - you are so cool. Like, soooooo cool. Thank you for the tutorial. Someday when I have the cash, I am going to hire you for real to do my WHOLE house. Your taste is fantastic but realistically priced for the average person. I love it and I love your blog.
ReplyDeleteP.S. I am in the process of making the changes you suggested for my bedroom and I'll send you pictures of it when I'm done. I think you'll approve!
Fabulous!
ReplyDeleteOh wow....I am so inspired and you made it look so easy. This is going to be filed away for me to try. The results were amazing. Also congrats on the new baby!
ReplyDeleteI think I prefer this to the mirrored furniture look! It's so elegant
ReplyDeleteIncredible and gorgeous!
ReplyDeleteWhat is also incredible is that you are able to post these lovely tutorials after giving birth --at home-- less than a week ago!
Well done, Mama!
All I can say is, WOW!! I love your ingenuity and creativity!
ReplyDeleteYou did a great job this is absolutely gorgeous! Thanks for sharing all your lovely ideas and tutorials. Congratulations on all the votes for AT Homies.
ReplyDeleteSo amazing! You're so inspiring. Thanks for sharing. :)
ReplyDeleteThis looks terrific! I've tried this technique before, and it is kind of fun, and mesmerizing!
ReplyDeleteOn a simpler piece of furniture, it would be cool to try a faux marble finish on the top as well!
Hope you're having fun with your new little project! She's a cutie!
All I can say is, WOW!!!!!!!
ReplyDeleteOh my - breath taking! And you make it sound so easy!! Someday I am totally going to try this!
ReplyDeleteThose are gorgeous! What a fantastic idea!
ReplyDeleteSo beautiful! I can't wait to do something like this in my house. How does the finish keep up after your done? Does it scratch easily?
ReplyDeletewww.rockyriverfarmhouse.blogspot.com
gorgeous! really, you are so talented.
ReplyDeleteThose look great. I would never have had the patience but finished product is amazing.
ReplyDeleteI love it, thank you for the tutorial
ReplyDeleteThose are gorgeous! Thanks for sharing this project!
ReplyDeleteI far prefer the silver leaf to the mirror. Lovely work!
ReplyDeleteThose turned out AWESOME! Just visiting from Rhoda's- and I will definitely have to try that!
ReplyDeleteJenny - believe it or not I've been planning on gold leafing the wooden parts of an arm chair and this post really really helps me so much. I was going to just use spray adhesive, but now I am wondering if I should use the sticky stuff you used. It's not nearly as much "real estate" as your dressers though. Hmm...
ReplyDeleteAgain, amazing job, you are the new Martha Stewart!
Lovely!! I know just the spot in my library where a silver leaf end table would be perfect...
ReplyDeletewow! beautiful!
ReplyDeleteI have to do this! B-U-Tiful!
ReplyDeleteYou are one talented lady! I love this technique as i have a small dresser that i have been dying to do something with other than paint. I thank you for your detailed instructions as i think i may tackle this project on my own. Wishing you a Happy New Year and i look forward to more inspiration from your fantastic read..
ReplyDeleteLooks wonderful!!! I have wanted to do this but was intimidated by the material. Now that you've broken it down, I know I can do it. Thanks... You rock!
ReplyDeleteWow that chest is fabulous!! Now you've got me thinking about my dining table??!!!!
ReplyDeleteP.S. I just read your post on the birth of Evie, holy moly you're quite the WOMAN!! Amazing!!!
Blessings to you and your family in 2010!!!
This is absolutely inspiring!!!:)
ReplyDeleteWhere do you buy aluminum leaf??
Happy New Year!:)
This is amazing!! So... do you think I could do this to my piano? It is an old black laquer upright that I got for FREE on craigslist. It needs to be rekeyed anyway, so I could that after the project... please someone tell me I'm insane!
ReplyDeleteThanks for all the kind comments, guys! One of my resolutions this year is to be really good about responding to questions in the comments section. So, here goes! Please let me know if I missed your question.
ReplyDeleteNatalie - The finish was surprisingly resilient! I definitely would seal the leaf though, just to be sure. Wipe on poly is my favorite.
Sandra - A silver leafed dining table would be FAB. Make sure to seal that bad boy up really well though. Two coats of poly at least.
Debbie - the link to the aluminum leaf is embedded in the post, but here it is again:
http://www.gildedplanet.com/aluminumleaf.asp
That website is an awesome resource on all things gilded.
Baden Fox - WOW! A silver leafed PIANO!?! That would be a major project, but completely amazing also. Please send pics if you decided to take that on!
jenny
This is AMAZING....so inspired.
ReplyDeleteThis is brilliant!!! I love reading your blog and getting such great ideas and inspiration. You are incredible at taking something rather plain and making it really gorgeous! Good job!
ReplyDeleteI can´t wait to read more..
Kristina from www.kandco.se
Sweden
I have to say between the shape and the nobs - your eye is amazing! I have never seen DIY leaf look this good.
ReplyDeleteyou are forever talented! I HAD to share your creativity at my blog ( luxeandlillies.blogspot.com) Thank You for this great inspiration!
ReplyDeleteI really really love this! I also love the idea of mirrored dressers but find them either expensive or too cheap looking. I have always wanted to try gold/silver leaf! Great project!
ReplyDeleteHow fantastic! I'm so impressed with your creativity.
ReplyDeleteA-MA-ZING! Amazing! You are the project queen!
ReplyDeleteso great! you are a genius.
ReplyDeleteWhat a great porject! Keep up the great and inspiring work!
ReplyDeleteRegards,
Mr. Goodwill Hunting
Fab.U.Lous!! Love this! I mirrored a small nightstand, but only because the mirror was free. I also used a bit of silver leaf, but I couldn't really tell the difference in the parts where I used the silver leaf and the parts where it was just the silver spray paint. Here's a link to my project:
ReplyDeletehttp://embellishedbayou.blogspot.com/2009/06/transformation-thursday.html
This is so gorgeous and you did the most amazing job.
ReplyDeleteI silver leaf the top to a tiny table and it came out so much more wrinkly and messy. I don't know how you did such a perfect job here but I bow down to your skillz!
WOW
ReplyDeleteThis is brilliant! Love the finished chest.
ReplyDeletejust came over from centsational girl - those are gorgeous and i am so inspired to try a gilding project - thanks!
ReplyDeleteThis is amazing! I would have never thought of this technique. The end product is stunning.
ReplyDeleteWowza!!!!!! $75???? That rocks! Leafing is amazing!!!!!! Great job!
ReplyDeleteJust one word...WOW!!!
ReplyDeleteLove those! Such a great job!
ReplyDeleteFantastic!
ReplyDeleteI would so LOVE to attempt this... but I am scared! I will have to see if I can find some night stands as cute to transform. amazing job!
ReplyDeleteOMG, this looks gorgeous. And you make it sound so easy. Would love to try that with some chunky old dressers in my house.
ReplyDeleteUtterly Fantastic! I love Silver furniture and so loved your project! I am new to blogging and so happy to of found your blog!
ReplyDeleteHow BEAUTIMOUS!!!!
ReplyDeleteThose are so GoRgEoUs Now! You are amazing!
ReplyDeleteprobably the best thing i've seen in a LONG time! thanks so much for doing this and posting this. it was the kick in the tush that i needed. i have a chair and desk i've been wanting to silver leaf but was unsure how to do it. your project looks ah-mazing!!!! you rock.
ReplyDeleteFabulous--love this so much--it truly is amazing! Now to go check out the rest of your blog.
ReplyDeleteHoly cow! I must subscribe to you now. Fantabulous!
ReplyDeleteDo you think I could do this to a crib, and seal it really good, without it getting eaten off? I'm planning a nursery for my baby girl and think this would be great!
ReplyDeletedo you think this would work on a surface that wasn't really flat? for example, my landlord gave us this random (and large) statue of a horse for christmas.....and it would look much better silver. hmmm.
ReplyDeleteLove the project! Thank you for giving us links to your sources. Makes it easy to find things. I could spend all day on your blog.
ReplyDeleteWhy did you paint it first? I will start this project as soon as they get the aluminum leafing back in stock.
ReplyDeleteThis is absolutely beautiful! You inspired me and I tried it! But mine isn't as smooth as yours. How did you smooth out the finish?
ReplyDeleteTotally and completely awesome. This is exactly what I have been looking for. I have a dresser that the finish has chipped/cracked and want a "mirrored" dresser, but, of course the cost was prohibitive. Thank you soooo much. I can't wait to get started.
ReplyDeleteI just completed a Silver Leaf End Table - love the process.
ReplyDeletehttp://thesplurgeorthesteal.blogspot.com/2010/04/diy-silver-leaf-end-table.html
WOW! Just found your blog, and that is BEAUTIFUL! Definitely something I'd love to try soon!
ReplyDeleteHi! I know you are probably sick of hearing this but, what a BEAUTIFUL dresser. I am actually about to do this to a craigslisted wooden dry sink that will be used for a bedside table slash dresser.
ReplyDeleteI have a question for you. If I were to opt to seal it with a "wipe on poly," what finish would you suggest? Satin? Gloss? Would gloss make it look more like a mirror?
Thank you for your great tutorial!
Jay
Thanks to a post from Better After, I got to read your fantastic tutorial and witness perfection! Bravo!
ReplyDeleteThis really inspired me, and I just completed my own! You weren't kidding when you said this was time consuming - but so worth it! Thanks!
ReplyDeletethis is awesome!
ReplyDeleteokie dokie. Now that I've found this post, I'm going to try this on an antique kidney-shaped desk I just bought. BEAUTIFUL work, and I don't mind a little pixie dust obsession, either. :-)
ReplyDeleteThey look beautiful. I'm about to try gilding a table, which is how I found your blog.
ReplyDeletelove the silver leaf dresser. i'm going to try and silver leaf a chest i have at home. wish me luck!!
ReplyDeletewow great i have read many articles about this topic and everytime i learn something new i dont think it will ever stop always new info , Thanks for all of your hard work!
ReplyDeleteThanks for the helpful post! I would not have gotten this otherwise!
ReplyDeleteJust want to say what a great blog you got here!I’ve been around for quite a lot of time, but finally decided to show my appreciation of your work! Thumbs up, and keep it going!
ReplyDeleteThis is just gorgeous! I'm going to try this on my jewelry cabinet. Thank you so much for the inspiration!
ReplyDeleteI have wanted to post something like this on my website and this gave me an idea. Cheers.
ReplyDeleteJust beautiful! I love the mirrored look, but alas, too much for my budget :(
ReplyDeleteJenny ^above^ and I will be having a leafing party together this next month! Thanks for the inspiration!
Those turned out amazing! Great jpb!!
ReplyDeletethis is so cute!
ReplyDeleteI love this! Thanks or the tutorial.
ReplyDeleteI am in LOVE! Totally going to try this! thanks so much for the tutorial!
ReplyDeleteThis is amazing! You did a fabulous job on this piece. Thank you so much for the tutorial.
ReplyDeleteThis is amazing! You did a fabulous job on this piece. Thank you so much for the tutorial.
ReplyDeleteIt looks fabulous!
ReplyDeleteI love silver leaf- such a bold statement!
Elle
This is a beautiful job and it's just what I was looking for. I purchased two of the bombe chests from Bombay for $25 each from the clearance sale when they went out of business in the US a couple of years ago. The marble top is cracked/broken and I don't know how to replace them but thanks to you, I now know how to silver leaf them, which I sincerely appreciate.
ReplyDeletehi...u just got me inspired i saw ur post thru centsational girl...i just silvered leaf my dresser but i didnt like the way it looked well some areas looked perfect and some of them they were too wrinkley...do you think if i poly them those imperfections will blend ?i wish i can add a picture so you can give me an advise
ReplyDeleteWow! It's awesome blog post here. really very interesting for reading.Like those pictures.. I enjoyed it.
ReplyDeleteGreat post,very informative.
ReplyDeletePlease continue to write more
interesting post in your blog.
mobility vans
terrific! I didn't read all of the comment/questions, but do you recall if you used water-based or oil-based size adhesive?
ReplyDeleteThis is amazing! I love it! I gold leafed a mirror, but that was small stuff next to this. I have two end tables I'm working on with silver metallic paint, but I think I'll silver leaf the top. In one blog I saw, she used crinkled up aluminum foil and sizing. Awesome! Thanks for sharing.
ReplyDeleteDiddie
Hi! I want to try this project, but when I went to the website for the aluminum leaf, I wasn't sure which product I was looking for. Can you give me more detail?
ReplyDelete::slow clap::
ReplyDeleteAMAZING.
You've inspired me. During my lunch break (and after 3 days of researching) I went to an art supply store and bought some imitation silver leaf and size to cover a blanket box I rescued from the dump. Wish me luck!
I just have to say that you inspired me too! Your blog posting was a reason I decided to aluminum leaf an old french provincial chest and nightstand that I've had for some time. I posted about it on my blog. Feel free to check it out. :)
ReplyDeletehttp://diyprojectsbynina.blogspot.com/2012/05/aluminum-silver-leafed-french.html
This looks so awesome! I really want to try as well. WIsh me luck! Those tables were a great find too.
ReplyDelete