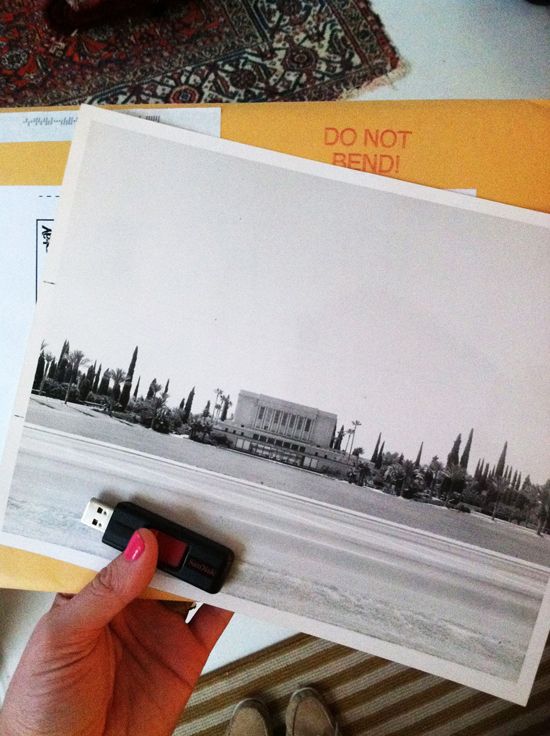
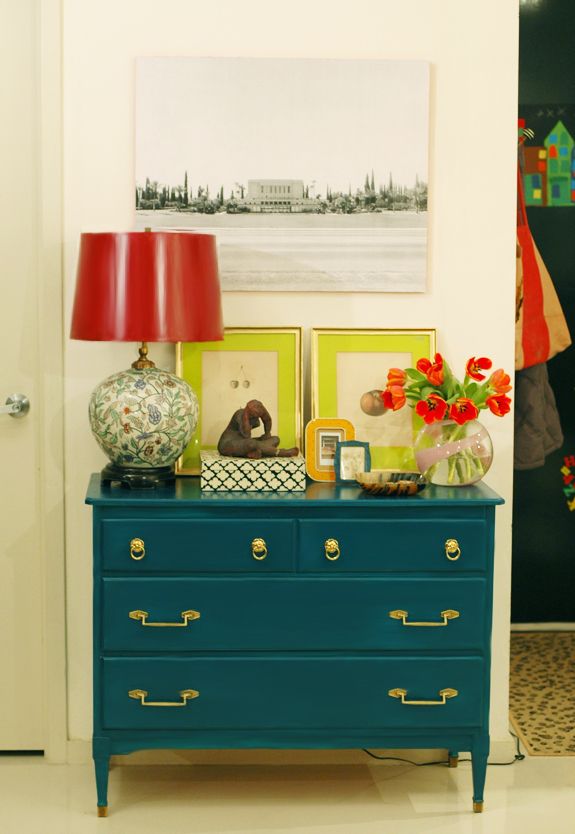
Later I saw this tutorial on Pinterest and knew I wanted to blow up my vintage photo for our home. I scanned in the photo and brought my zip drive to Kinkos (Or I guess it's called Fedex Office now? Bor-ring!). For only $4 they printed my image on their large format blueprint printer. The largest size you can do is 48" wide, but mine is 36". It's so inexpensive because the paper is nothing special and you can only have black and white. But it's huge and graphic and so affordable!
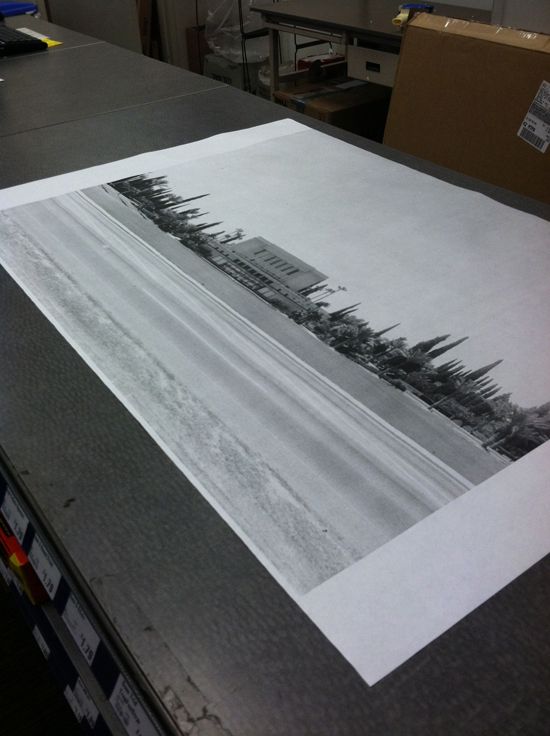
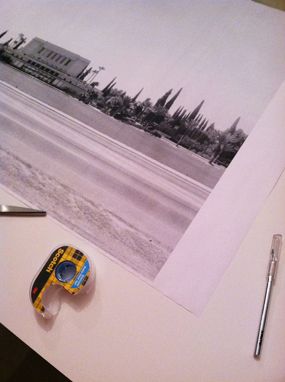
I cut down the paper to size and then mounted the print with scrapbook tape on double thick foamboard I got at Blicks for $7 (which I also cut down to size using an X-acto knife).
After mounting the print I realized I could save a ton of money by not framing it and just painting the edges. I used an orange tester paint that I already had on hand and a square-edged artist's brush. It was easy to carefully paint just the edges of the foamboard.
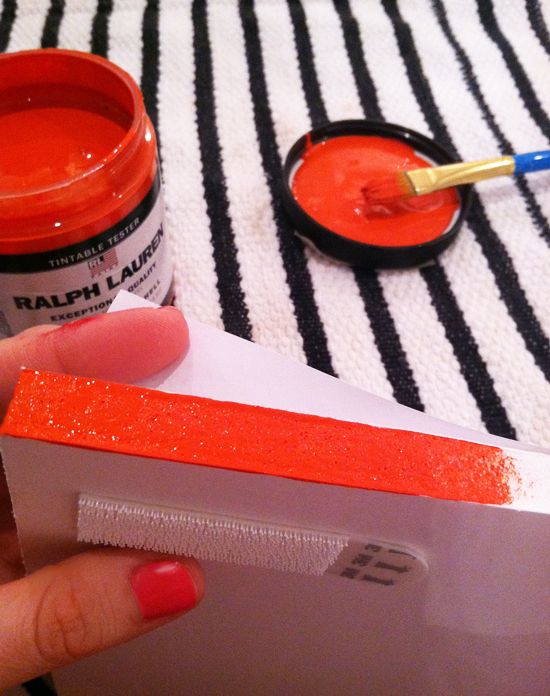
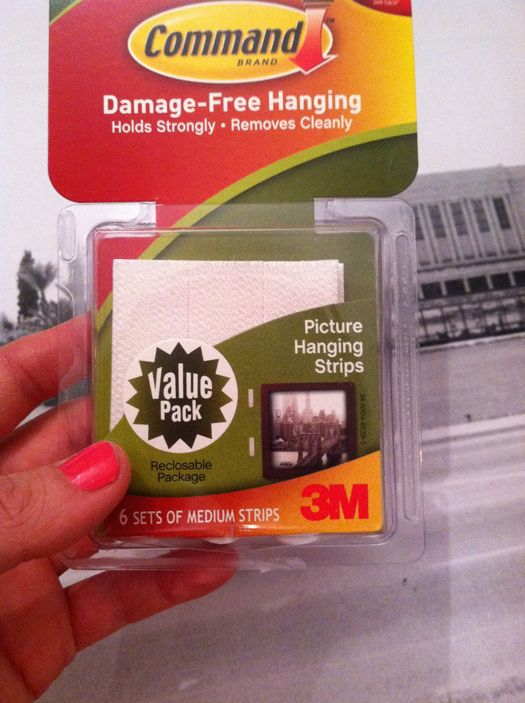
I hung the mounted print on the wall with my favorite picture hanging strips.
I'm so happy with how this project turned out. I only wish my wall was bigger so I could have done the full 48" width!

Simply AMAZING! One of the best, easiest DIY I've recently seen!
ReplyDeleteBeautiful! It really looks perfect there too!
ReplyDeleteto think that it was only yesterday i wanted to ask how you would display church pictures!
ReplyDeletethanks so much..i love the orange surprise..just like the door you posted yesterday.
can't wait to give it a go.
BEAUTIFUL! Love the whole chest/lamp/accessories!
ReplyDeleteLove your BLOG - you have a real talent for design. I'm LDS also.
ReplyDeleteThis is a great trick! Had no idea it's no longer Kinko's!
ReplyDeleteHey, that's a great idea. There are tons of awesome old photographs available to the public (Denver Public Library for one has an enormous online collection), and I love your idea of dressing up the edges with paint. Thanks for sharing!
ReplyDeleteWhat did you use to mount the picture to the foam board?
ReplyDeleteLove that! What a great DIY! Love how it looks with the red lamp shade and teal chest too! You're awesome Jenny!
ReplyDeleteChristina
www.Christinamarieinteriors.com
This is the best DIY that I have seen in a long time. I love how affordable it is. The vermillion is lovely. I am thinking hard about what photo I would do this with.
ReplyDeletecool idea. I'm going to do this one. thank you so much for sharing!
ReplyDeleteIncredible! I have to try this. Thanks for sharing!!
ReplyDeleteAnna
This is so simple yet so meaningful. I love it! And your whole entry area is just perfect, too!
ReplyDeleteI LOVE this. I have to pick a picture and try to tackle this one soon. Thanks so much for sharing!
ReplyDeleteIt looks great! I am totally distracted by that chest of drawers, though! Did you paint it yourself? What color is it?
ReplyDeleteLove it! Huge art for $4, yes please.
ReplyDeleteHow great I love this! And I am also head over heels for that lamp!
ReplyDeleteThis looks great, and fits your spot just perfectly. The lamp, and chest, the whole works is so pretty and interesting. I might try this with the picture I have of me and my family in front of the Mount Timpanogos Temple. I think your brilliant! Thanks for sharing all your good ideas.
ReplyDeleteAhhh amazing! Can't believe it was only $4, it looks way more than that!
ReplyDeletegreat diy thanks for sharing :-)
xoxo
eileen
Wow how wonderful! I love that you painted the side of the wood to make it pop!! =)
ReplyDeleteLemanie's Randomness Blog
You have a wonderful flair for color. And one of the best blog headers I have seen!
ReplyDeleteFabulous idea, Jenny! I love the statement of huge art pieces! Beautiful vignette, btw!
ReplyDeleteJust saw this on Pinterest and linked over - awesomest photo of a temple EVER. Seriously.
ReplyDeleteDid you use spray adhesive to stick it to the foam board?
I saw this done and thought it was a good idea, but your fun pop of color on the edges made me fall in love! what a fun detail that MAKES the project :)
ReplyDeleteLove it! Love the pop of color on the edge, and I had no idea that prints could be had for so little. Thanks for sharing.
ReplyDeletelove this! I always want to blow up some of my old photos. I usually end up being too hesitant because of the loss of quality. Did the photo have any problems being blown up or did it become extra grainy or pixelated? I can't really tell from the pictures on the blog.
ReplyDeletethanks!
Nicole
what a great idea! and I love the pop of color - so modern!
ReplyDeleteThis is such a cool idea!! I'm definitely going to try this.
ReplyDeleteAbsolutely love this!! Such a smart DIY and I love the pop of color on the sides. Bravo!
ReplyDeleteAdore this idea, and the orange painting on the edge is genius! Those command strip photo hangers have become my new best friends, too.
ReplyDeleteCan you say anything about the small peacock blue dresser the print is hung above? Did you paint it, and if so, with what? I LOVE that color.
ReplyDeleteLove it! Great idea! I think I might have found my weekend project.
ReplyDeleteCan you say anything about the small peacock blue dresser the print is hung above? Did you paint it, and if so, with what? I LOVE that color.
ReplyDeleteThe best diy I've seen in a long time!!! Love it.
ReplyDeleteAmazeballs! And such an easy DIY. Thanks for sharing!!
ReplyDeleteThe AZ temple is by far my favorite, I love the style of it! You are brilliant, how do you think up these things. It looks so amazing!
ReplyDeletethat's really cool; it looks great!
ReplyDeleteLove this. Looks fabulous.
ReplyDeleteWow. I love this project!! Hoping I will have some good luck finding a similar photo of the Mesa temple, they are hard to come by! Thanks for sharing.
ReplyDeleteWould you be willing to share the scanned photo of the temple? It is just so great!
ReplyDeleteWhat a great idea! I also adore that pretty black and white box on your entry table - could you tell me where you found it?
ReplyDeleteOh, the color in the tulips picks up the edging of the print...and the green stems lock nicely with the green mats on the two frames....understated perfection!
ReplyDeleteI love this! What a great idea. I have some photos I would love to try this DIY. Thanks for sharing.
ReplyDelete- Jill
This comment has been removed by the author.
ReplyDeleteI did this same thing to a very large cheap poster that would cost 10 times the amount to frame it. Foam board is awesome!
ReplyDeleteI love the pop of orange you chose and seriously your vignette on the dresser is stunning!!
it looks great! i might have to make one myself.
ReplyDeleteLooks amazing!
ReplyDeleteSeems like Martha's idea about painting the door edges lodged in your brain. The last pick and the pick just below on the last post of the door look almost identical! I love both! :)
ReplyDeleteLove that you shared this! That is so cheap! And I'm also really interested in the results you find from your study. Just completed it and thought the questions were interesting.
ReplyDeleteSO CUTE!!!! Thanks for the ideas!
ReplyDeleteNancy
http://www.powellbrower.com/2012/02/my-first-sofa-reupholster.html
I love this look and have been trying to find a more mod way to hang one of our wedding prints. I'm doing this!
ReplyDeletewhitneykayestyles.blogspot.com
Oh please detail how this was mounted on the foam board PLEASE PLEASE!
ReplyDeleteI recently ordered a "big print" from http://www.etsy.com/listing/54285512/summer-bounty-poster and I'm thinking this might be the perfect way to "frame" it.
ReplyDeletecall me naive, but until this moment i never realized that you were lds. as a fellow young lds woman who is about to get married and embark on her career in interior design... i just want to say thank you for being an incredible role model. to do what you do with three young kids at home is pretty impressive. i so want to do what you do! you have managed to balance your life so well with all the important things. you've made time for both your family and their needs & for YOU and yours. again, i just want to say thank you! you are so inspiring!
ReplyDeletexx
katie beth
Great idea!
ReplyDeleteI would love to mount my kid's art in the same way, paint the edges bright colours and make a gallery wall.
I love the way this turned out! How in the world did you get such clean lines with an exacto knife? I have tried cutting foam board with one and it was a nightmare.
ReplyDeleteI love the way this looks - can you tell us a little about the resolution required to blow up something this big.
ReplyDeletethanks
I adore the combo of the photo side trim with the lamp and the tulips. Gorgeous!!!
ReplyDeleteJenny, I absolutely love how you mix pattern and color, botanical prints with black and white photography. It's encouraging me to let go of the "rules" and just decorate with what I love. Just make it work and stop worrying about perfection. So inspiring. Also, love the blue chest of drawers in your photo. My living room wall is a very similar Benjamin Moore color, it's makes me smile everytime I see something in that beautiful jewel tone.
ReplyDeleteJennica
ReplyDeleteI love it! It's been great seeing all your ideas online.
K
what did you use to "mount" the picture onto the foam core board? Spray adhesive?
ReplyDeletewhat did you use to "mount" the picture onto the foam core board? Spray adhesive?
ReplyDeleteLove that you painted the outside of the print with that bright red paint! We're doing a feature this week on bright sheers and black and white to highlight fashion week and this is such a great example of how gorgeous the two are together!
ReplyDeleteThat is just beautiful! You can never go wrong with a picture of an LDS Temple. I have been searching high and low for great picture of the Logan Temple that is different that the usual. This is a great idea. I didn't know you were LDS, thats awesome!
ReplyDeleteI love cheap oversize art prints!! But the orange edge is the real stroke of genius. Brilliant, Jenny!
ReplyDeleteI knew there was something about you that said Sister in Zion... So glad you posted this! :)
ReplyDeleteYes, I love it! Super easy to do.
ReplyDeleteI can see how this was inspired by the door trim post you did earlier. I love the little surprise! What a great, inexpensive project!
ReplyDeleteClever girl, Jenny. I knew about the Kinko's (ahem-- FedEx Office) prints, but you NAILED IT with the foam board and painted edges. My boyfriend and I have been going crazy trying to figure out what to put on the bare walls of our bedroom, and I think taking some b&w photos of places that are meaningful to us is just the ticket.
ReplyDeleteThat looks amazing Jenny; that vignette is beautiful. I wish I was bold enough to use color the way you do.
ReplyDeleteyou're LDS?! i'm 18, and also LDS, and have loved your blog for a couple months now just because you have an amazing eye for design and you make it so easy. i also love that you put family first, and if things are getting hectic and crazy, you take a break and center yourself with your girls and your husband. it's a lot of pressure sometimes because there's always the question of, "when are you gonna get married?" but you've now helped me realize that i don't have to get married right away, i can do what i love and become who i want to be, and i will fall in love when the time is right. thank you so much for everything! and p.s. the orange is genius! (:
ReplyDeleteSuch a good idea! I love the accent of the bright orange.
ReplyDeletewww.idesignlove.com
I LOVE THIS SO MUCH! Thanks for sharing! Such a great idea for any picture but, I especially love that it had so much meaning to you and your famly.
ReplyDeleteHi I love this print you found. My husband and I were sealed in the mesa temple six years ago. Is there anyway i would be able to get a copy of this print from you?
ReplyDeleteHi guys! Thanks for the sweet comments!
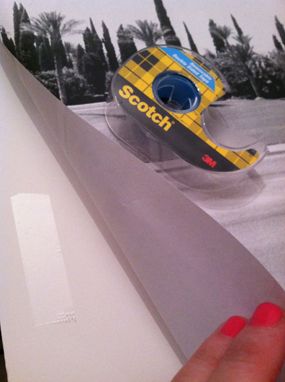
ReplyDeleteI mounted the print with double-sided scrapbooking tape. It was so easy and it's laying down perfectly flat (no air bubbles).
If you'd like the temple image file, feel free to email me and I'll try sending it to you. It's huge - like 4 mb, but I think it will send without a problem.
My email is jenny at jennykomenda dot com
xx
beyond awesome, INSPIRED - I love photography!
ReplyDeletewww.mash-upchic.blogspot.com
I love the large print! It looks great above that dresser and I like how you used the bright red/orange to compliment the lampshade. Great work!
ReplyDeleteHi Jenny- I'd love to know if the lamp shade on the dresser was a DIY or where you bought it. I just love the look!
ReplyDeleteThanks!
What an awesome project! My husband and I were also married in the Mesa temple eight years ago and there are so many more fences in all of our pictures compared to this one! Thanks for the inspiration and for sharing, I can't wait to try this (should be perfect above my piano!)
ReplyDeleteOoh, I love this idea!! I have been telling myself to get a picture of the Boise temple where we were married, but couldn't justify spending hundreds on it (even though we SHOULD have one hanging). This is a great alternative and much cooler if I do say so myself! PS I LOVEY love, LOVE your blog. I check it everyday! :) I used to live in NYC and it's fun to see it again through your eyes. So thanks!!
ReplyDeletewhat an easy way to do a big print and i LOVE that temple! i miss going there once a month but it's fun being back by the seattle temple (where i married my husband)
ReplyDeleteLove the colors!
ReplyDeleteI haven't been to your blog in a few weeks, but I kept seeing the 2nd to last picture (full shot) of the dresser and such on Pinterest. Then today, I saw the pic of your hand with the gold leaf pin everywhere on Pinterest. Now that I've looked at your last few posts, I see what everyone loves. Super cute!
ReplyDeleteI've been contemplating how to add an amazing image on my wedding location within our home...I think this is it. What RL color did you use on the edge of the image, I love it!
ReplyDeleteLove your blog...I visit everyday! Such great inspiration and DIY.
Hi Jenny!
ReplyDeleteI love your blog and am determined to make my own version of your diamond tufted headboard this weekend. I'm really excited and confident (likely overly so) because of your clear instructions.
I am intrigued by the dressers too. Would you please share the name of the paint color?
Thanks!
LOVE that temple! Such a unique design and so different from the more recent temples that I've seen (San Antonio, Orlando, DC, etc.).
ReplyDeleteThank you! I love this. Big question though: Do you think it would work just as well if I took a picture of a picture--I.e, a picture of something in a book?
ReplyDeleteFound this on pinterest...love it! I have many pics at home, (3000 miles away), and I can't wait to pick a few and try this. Thanks for sharing. Oh, and I have to know the color of that gorgeous blue dresser so I can buy some. Thanks, Lori
ReplyDeleteJenny, love this idea. My first attempt was a total fail, but my second was a success. Some advice: (1) on staples.com, you can upload your image and order the engineer's print from there, and then pick up at your local staples store. (2) don't try to modge-podge the print to the foam. The paper is totally not conducive to this - stick with the double-sided tape. (3) don't try to tape a bunch of craft store elmer's foam boards together to make a large foamboard. Instead, go to home depot and purchase a large piece of foam insulation. It cost approx. $12. The store will cut the foam to size and it's MUCH cheaper than the craft foam boards. Good luck!
ReplyDelete