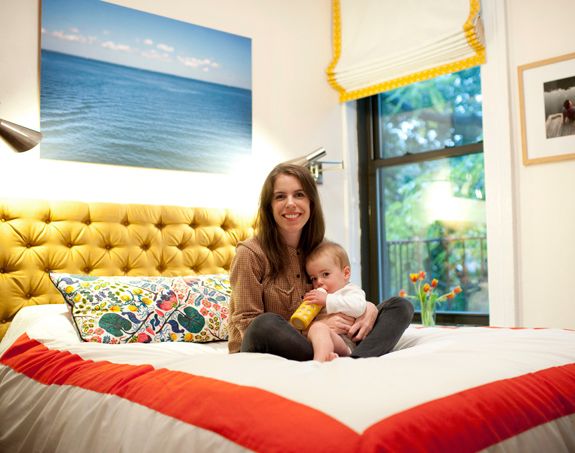
I love oversized art, but it's a challenge to find an affordable way to hang/frame the art. I really wanted to do a large photo of the ocean or the sky over Joanna's bed, sort of like this one:
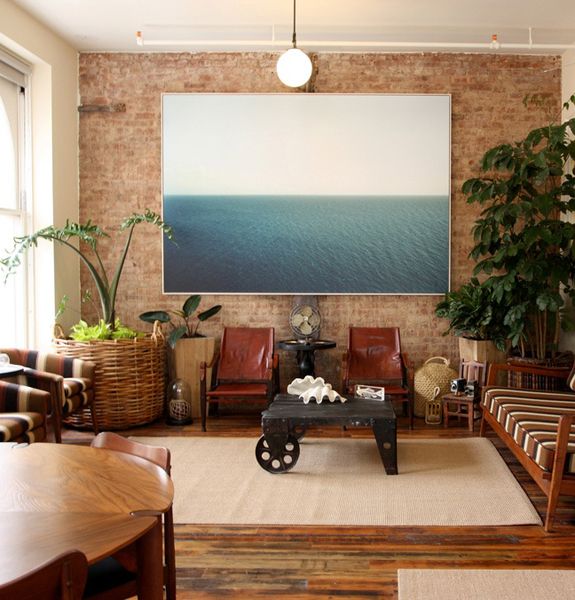
We felt SO lucky when Max Wanger snapped this beautiful photo for us while he was on vacation at Martha's Vineyard. I love the pretty colors and it has a really chill, soothing vibe about it.

Max was kind enough to print the photo for us, but if you are looking for an online print shop, I've used Wizard Prints and U Printing before with great luck.


We considered getting the photo professionally framed but in the end we opted to save the $400 and go for a really inexpensive option.

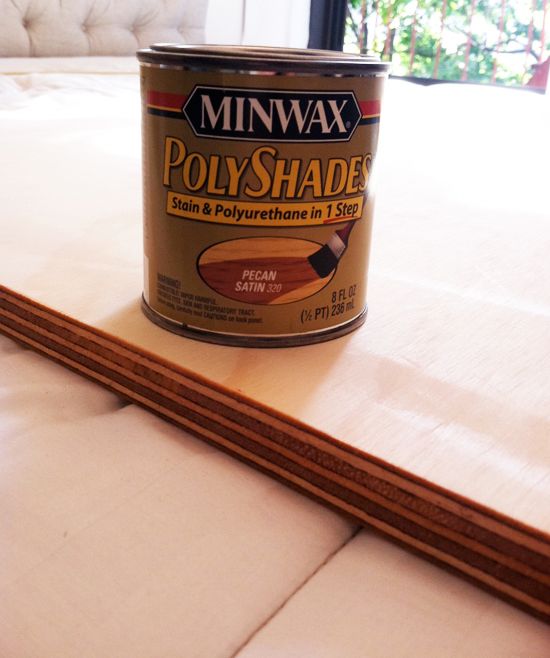
I got a smooth sheet of plywood cut down to size at Home Depot. I especially loved the striped edges.

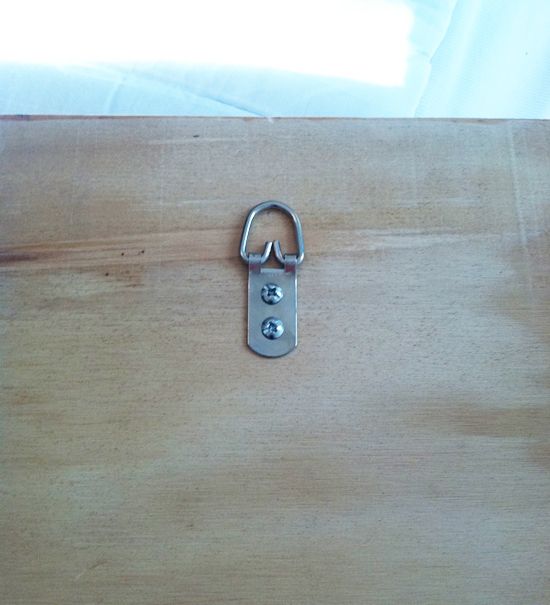
I used a poly/stain combo to finish just the edges and then a screwed two D-rings to the back of the board.


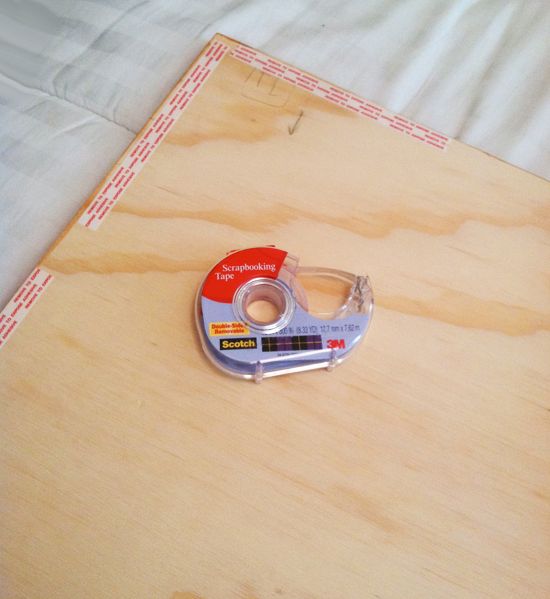
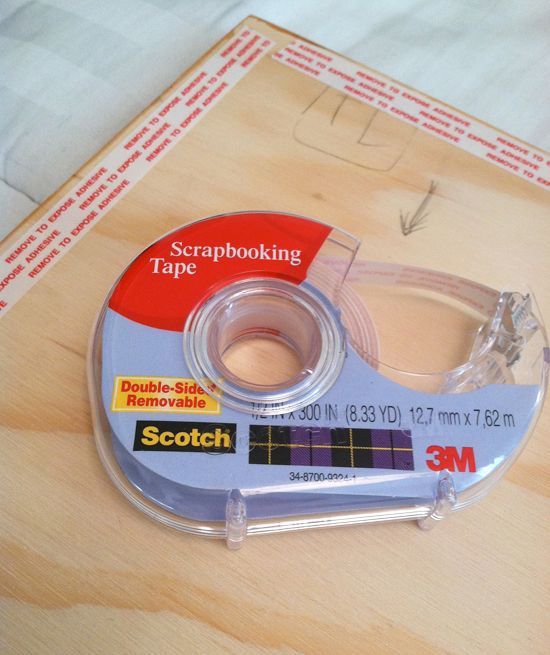
Then I used acid-free scrapbook tape to mount the photo right to the plywood. We used removable tape (it comes in permanent too), so Joanna still has the option to have the photo professionally framed down the road.
We spent about $20 for this project. It worked really well for this space since we didn't really need protection for the photo. It would work similarly well for hanging above a big piece of furniture like a console or credenza. You just want something in front of the art to prevent bumping into it.
Do you have any tricks for framing large art on the cheap?
This comment has been removed by the author.
ReplyDeleteScrapbooking tape? Genus idea!
ReplyDeleteI never thought of seeing the layer of wood. It looks cool. Here is how I did an inexpensive custom frame http://mycraftyhomelife.blogspot.com/2011/09/my-custom-pink-pagoda-frame.html
ReplyDeleteAwesome idea.
ReplyDeleteThank you! I just ordered some Michelle Armas prints and this is a perfect way to hang them over our bed!
ReplyDeleteI love the idea! But... plywood emits a lot of gases throughout its lifetime, so I'd caution against framing anything of value this way. Over time, it will probably erode the art hung on it, even if the work is archival or acid free. As long as Joanna has the image file, though, it's not a problem!
ReplyDeleteLong time lurker/printmaker/former frame shop employee here!
Very clever! What a great way to make large pieces accessible for most people.
ReplyDeleteVery clever! What a great way to make large pieces accessible for most people.
ReplyDeleteFor the oversized botanical prints in my family room (http://house185.wordpress.com/house-tour/) I had them mounted on foam core at Hobby Lobby and built a frame for it out of 1 x 2's. Like your project, custom framing would be VERY expensive - especially since I had 2!
ReplyDeleteGreat idea! Any alternatives for those of us with plaster walls trying to avoid making holes?
ReplyDeleteso great! you are too crafty Jenny. and not in a bewitched way. in an awesomesauce way.
ReplyDeleteBethany
http://www.powellbrower.com/2012/02/holy-trinity.html
Such good ideas! You always have a trick up your sleeve. I love this one. Thanks for sharing all your knowledge and findings with us.
ReplyDeleteThanks for sharing… this is great!!
ReplyDeleteI would have never thought to mount it with scrapbooking tape! Genius! Thanks for sharing.
ReplyDeleteThis is an amazing idea! Thanks!
ReplyDeleteI used that plywood to make a desktop for trestles from Ikea - and love the shapes on the top and the layers on the side (I put the side with the blue markings out to the front, too)... glad I read what Cholla Cholla said, though! Will remember that in future.
ReplyDeleteYet another genius idea from LGN! Where are the sconces from? They are great!
ReplyDeleteI love this idea. You're getting the impact of the large print in the space without spending a lot of money. Looks beautiful!
ReplyDeleteI like framing a large photo or map over a grid of smaller frames.
ReplyDeleteVery cool. I feel like I'd have a hard time getting it lay out straight and perfect.
ReplyDeletethis is a fabulous alternative . . . framing can be so pricey and (not-to-mention) HEAVY with all that glass. this seems so much more easy to manage.
ReplyDeleteLove how the picture turned out! Very cool idea! I framed a vintage sign we bought at a flea market. I did use an IKEA frame, but it was way cheaper than having it professionally framed.
ReplyDeletehttp://www.willscasa.com/2012/01/how-to-frame-a-vintage-sign-on-the-cheap/
you just gave me an awesome idea to hang a gorgeous photo my husband and i took of crater lake a few years ago. thanks for always posting info that's so useful and accessible!
ReplyDeleteWhat a great idea! I like the dimension the plywood gives to it. Much cheaper than mounted canvas!
ReplyDeleteHome Depot has thinner and lighter weight masonite, and pressed board sheets that can be used for frame/backing with Swiss Clips. I buy Swiss clips at DBlick under $10.00bills. You can also use a plastic sheet that covers ceiling light (also at Home Depot). Round the corners with pieces of soft plastic or dense foam.
ReplyDeleteYay! This post was sent to me by a friend who was with me when I bought a huge poster. SHe asked how I was going to hang it & I said I'd mount it on plywood! BUT I didn't think of staining the edges (nice touch!) or the removable tape. Thanks!
ReplyDeleteI love this idea and have thought about creating my own frame by purchasing trim from Home Depot, painting and assembling it. I might have to give it a try in the next couple weeks.
ReplyDeleteWhitney
whitneykayestyles.blogspot.com
Brilliant!! I am going to look through my photos right now!!!
ReplyDeleteLove this idea - so smart!
ReplyDeleteThanks for sharing!
I have thought of this but plywood is SO HEAVY. I hope that is hanging on a clete or screws for hangers that are screwed into the studs. I have toyed with Foam core since it is cheaper and lighter. Gluing two peices together and wood slates on the back to keep it from warping as it does. I have never had long term luck with the thin double sided tape and the sronger stuff is too thick. luv te idea
ReplyDeleteCat
Such a GREAT idea!!! I have 2 large pieces that this will work PERFECT for!! Thank you for sharing!!
ReplyDeletelove this - but also absolutely ADORE the bedroom - the headboard, the bedding, the shades - all of it is so beautiful!!!!!
ReplyDeleteGreat job!!
Joni
Brilliant! I have been trying to find a cheap solution for hanging a map in my son's room. Solution found. Thank you so much for this.
ReplyDeleteWent to Michaels (hobby/art supply) and bought a monster art canvas - with one of their weekly 40% coupons. Painted the edges flat black. Mounted my artwork on the canvas with the similar doublestick tape. All-in-all I came in around $50 - not counting the price of the artwork.
ReplyDeleteI love this too- especially for hanging a large photo which is very hard to do! I've also used giant metal clips to hang fabric and inexpensive prints: http://hellotruelove.tumblr.com/post/1621659874/clip-art
ReplyDeleteWall Buddies, found through professional framers. They are great, they are designed so that you can hang things perfectly straight, every time. I made an upholstered headboard a few years ago it has never moved!
ReplyDeleteLOVE that!
ReplyDeleteLovely!
ReplyDeleteYou are always so full of great ideas! Thank you!
ReplyDeleteSuch an awesome photograph! It looks great! I second what Cholla Cholla said though - the plywood touching the artwork will make it brittle over time, and yellowed. You can put a piece of acid-free barrier paper to go between the two if it was something that needed to last long-term.
ReplyDeleteI posted about framing large art, cheaply a week or so ago. http://designfluff.blogspot.com/2012/01/cheap-large-frames-diy.html
ReplyDeleteFoam core would be a lot lighter and easier to hang. I'd probably go that option - the plywood looks cool though.
ReplyDeleteTHanks so much for the step by step. I will definitely try this...
ReplyDeleteSo beautiful!
ReplyDeleteI am a wanna be artist and love the texture and effects of oil paint which in my opinion looks lovely framed with heavy layered frames which if bought new would be very costly BUT I shop thrift stores and buy beautiful frames often older wooden ones at a great price. 12x16 often 5-10 dollars, 16x20 10-25 dollars and very large for 30-60 dollars.One can even reuse the canvases too.
ReplyDeleteWhat a great idea for getting large prints up.
ReplyDeleteWhat's a great Idea ! I love it !
ReplyDeleteI am so excited to read this! I was going to have a photo blown up on canvas, but I'm going to try this first to save some money. As always, you are a genius!!!
ReplyDeleteI need your tufted headboard in my life!! And baby is darling!
ReplyDeleteReally smart! I love this idea! Huge art adds so much drama, but you're right, it can be hard to fit into the budget!
ReplyDeleteI wish I had seen this post two days ago BEFORE I dropped off my print at my local Fast Signs. They are gluing it to the exact same type of board you used...for $100. I thought that was pretty cheap but now I know I can do it myself AND save money AND I love that you used non-permanent tape so you can reuse the photo. great idea!
ReplyDelete