I love mother of pearl inlay furniture. The layer of texture it gives to a room is so COOL, but is it really worth the price tag? Larger pieces are several thousand dollars (sometimes more than $10,000 for repros!)
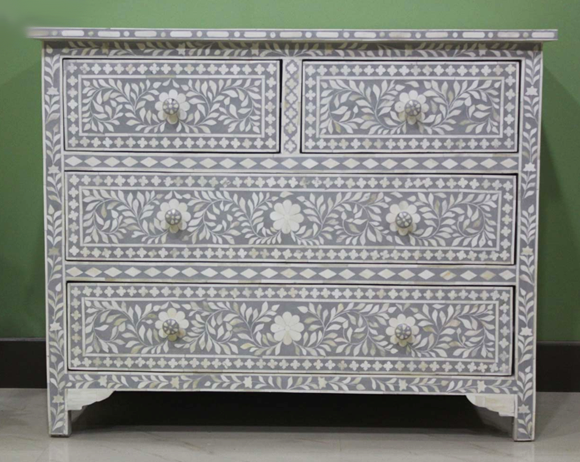
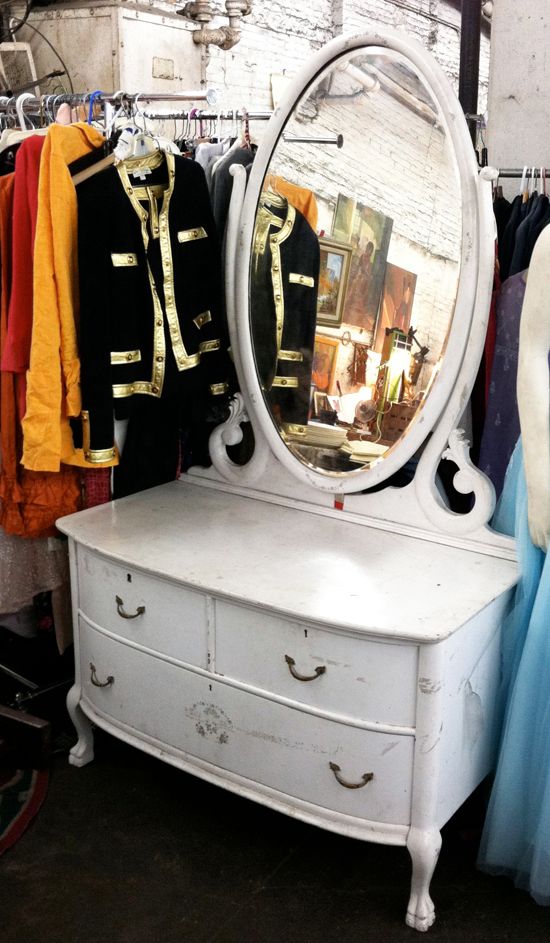
I bought this dresser at the flea market last fall for my girls bedroom. It fit perfectly between their twin beds and made a great joint nightstand. I thought the size and shape made this piece a great candidate for an inlay DIY. I was super excited when Sherwin-Williams invited me to join a group of talented bloggers to spread the word about National Painting Week. Each of us was assigned a color and I was thrilled to get purple.
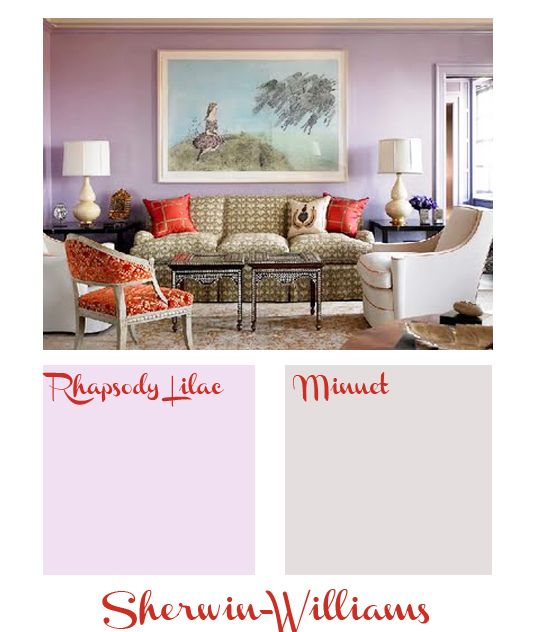
Inspired by the lilac wall color in this amazing Katie Ridder room, I chose Rhapsody Lilac for the main color of the dresser and Minuet for the highlights/faux inlay.
I used Sherwin-Williams waterborne interior alkyd enamel in both shades. It wears as well as full on oil-based paint, but cleans up like latex paint. It's low VOC and there is hardly any smell, (though you'll still want to keep your windows open or do the painting outside). It really is a great paint. It's made for trim and doors, but the hard-wearing formula is awesome for furniture as well.
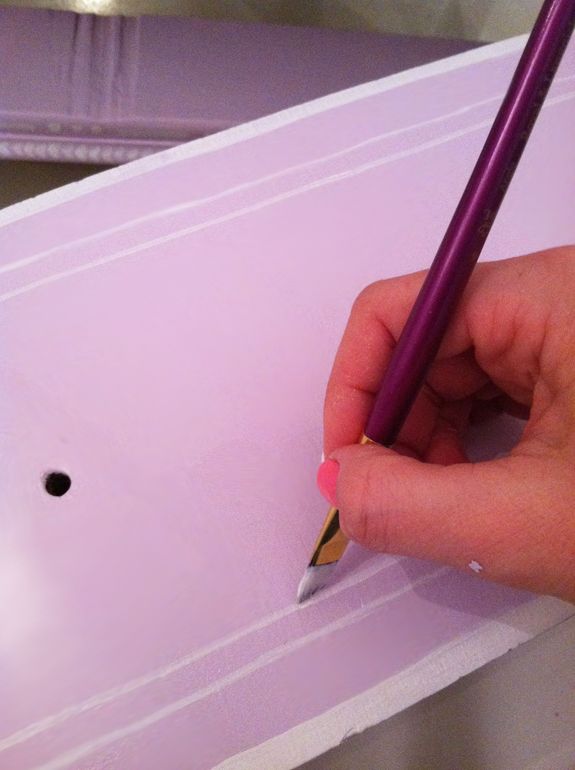
I lightly sanded the dresser and gave it two coats of Rhapsody Lilac in semi-gloss with a foam mini-roller. Once the base coats were fully dried, I took a glance at some inspiration inlay pieces online and just started doodling with an artists brush. I tried a couple different brushes and quickly discovered you only need one for this project - a 1/4" wide angled artist's brush.
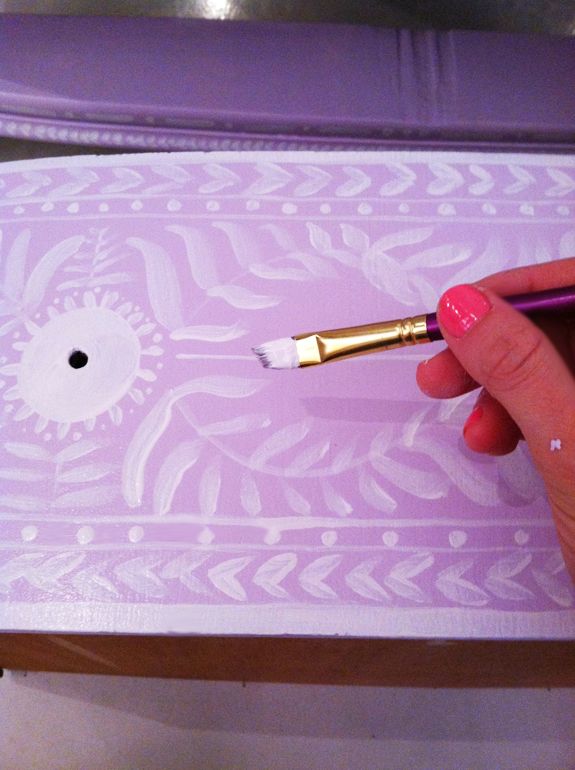
You can see on most of the real inlay pieces that the patterns are simple - a couple of circular stylized flowers with vines and simple leaves, all inside a border.
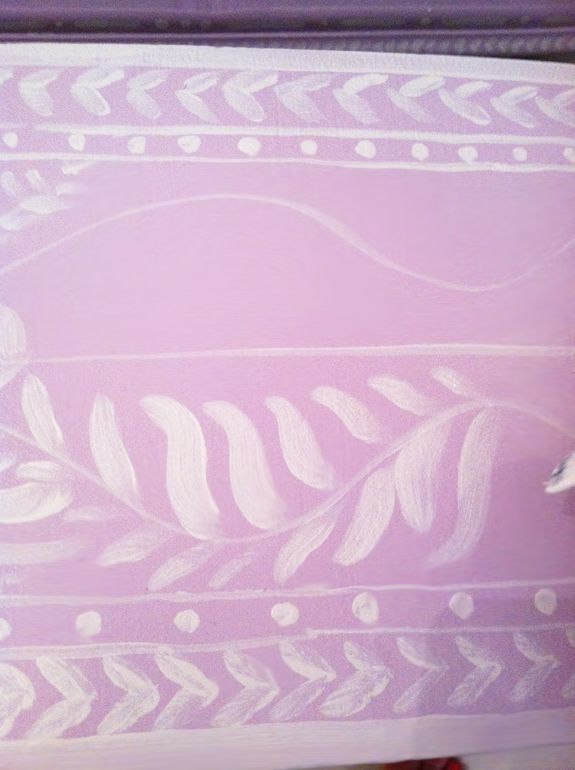
It feels like an intimidating project, but I found that the more relaxed you are, the better and more authentic the result is. I was over-thinking the design on the top of the dresser and that's my least favorite section now. Also, don't go over the leaves twice. The real bone or mother of pearl inlay pieces have a lot of color variation, so you don't want solid white design here either. The real inlay patterns are often not exact and are even a little crooked. Don't worry about perfection here. No painters tape needed!
Here's a little 10 second video to give you the sense of the speed of the project. It takes a couple hours probably to cover every surface with the doodling, but it feels like quick, light work.
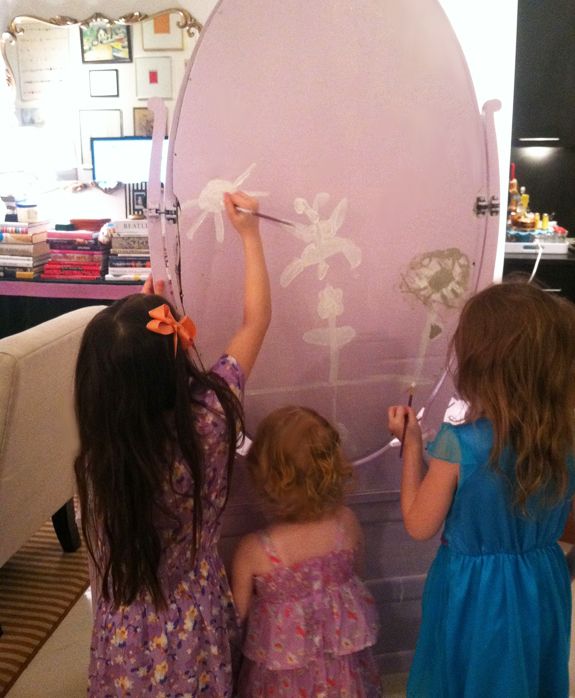
Can you hear my kids chattering in the background? This was happening on the other side of dresser :)
Once all the big surface designs were done, I went back and added small leaf patterns to all the edges and sides. This was the fun part for me and the look really started coming together with the addition of the smaller patterns.

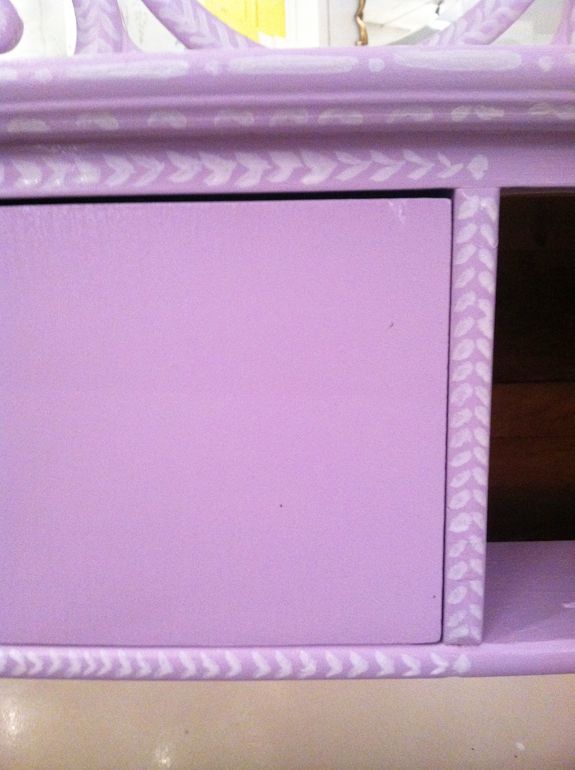
It doesn't really matter what design you paint or where or how, the idea is just lots of movement and pattern, in varying shades of white. The result is folksy and pretty charming. Perfect for a child's room!
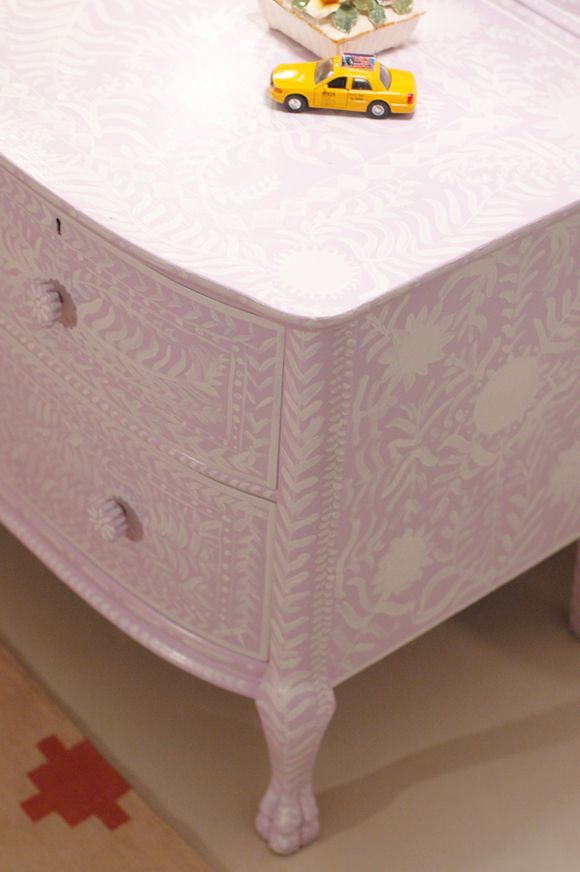
Oh - and a quick note about the knobs. After I started the project I realized I would need new knobs to replace the super traditional brass pulls. I was planning to just pick up some of those round unfinished wood knobs, but then I remembered I had a bunch of these green glass knobs from the clearance section at TJ Maxx. They already had a flower design on the fronts, so I just painted those white.
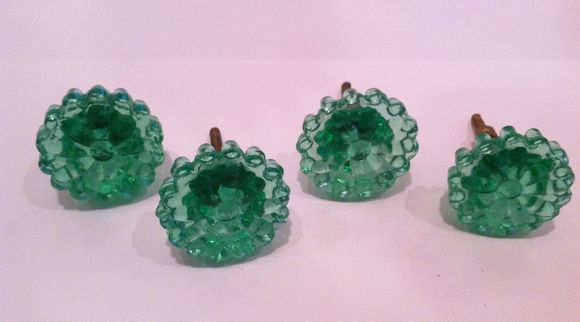
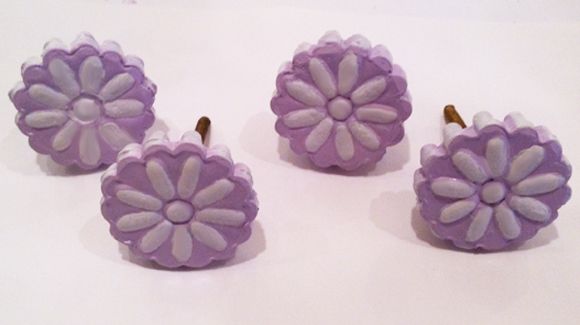
I love the dimension the knobs give!
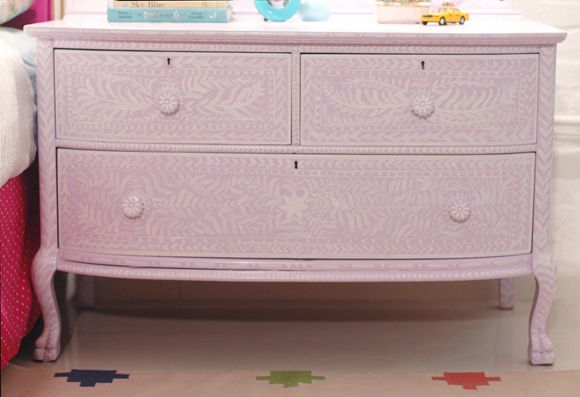
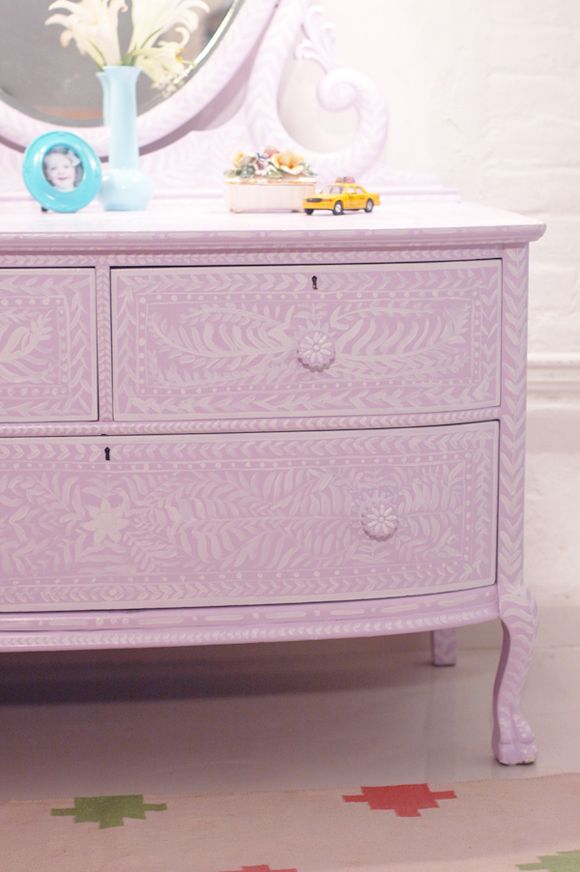
One of my girlfriends stopped by our place last week, coincidentally after some shopping at ABC where she saw lots of inlay furniture in pastel shades. She noticed the dresser as she walked past the girls room, gasped, said "Oh no you didn't" as she ran up to get a closer look at the inlay. Trickery = Success! Insert evil laugh and tapping together of finger tips!
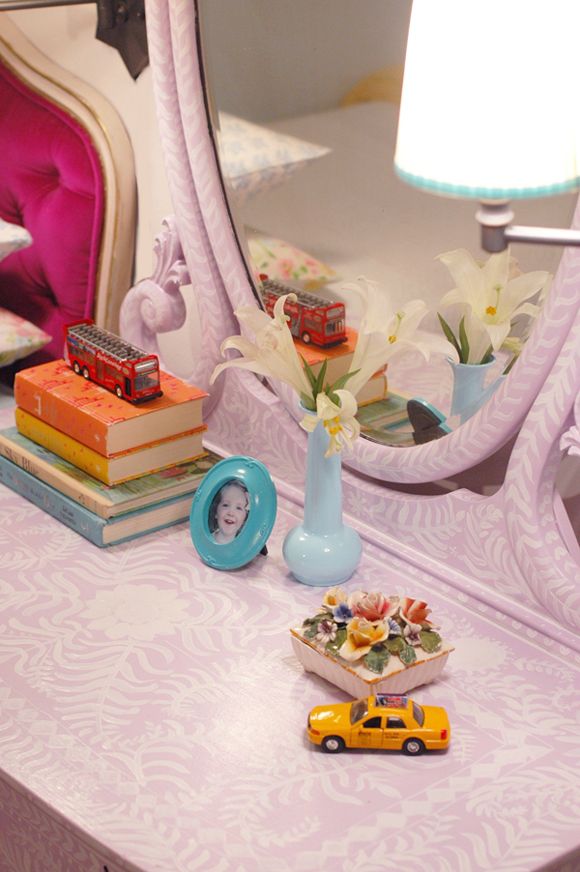
Later my friend confessed she was pretty confused at the thought of me spending five grand at ABC. She said that's not really my style, which I *think* I'll take as a compliment. :) I'm happy with the dresser, even though it's clearly not perfect, and super glad I didn't have to spend thousands to get the inlay look. Especially for something in my kids' room!

Have you checked out the other National Painting Week participant projects? Tomorrow is Aicia and Bruno from Curbly, so be sure to pop over there in the morning.
Also, I just wanted to thank you guys for all the sweet comments and emails about our super sick Gracie girl. I'm happy to report she is on the upswing today. Thanks for the suggestions and for giving me a little time off to take care of her. Have a GREAT weekend! xoxo
I like your DIY dresser better than the real McCoy!
ReplyDeleteWitty & Wonderful~
pve
Wow! Wow! Wow! Your skills are astounding! Blown away!
ReplyDeleteHi Jenny,
ReplyDeleteI love your dresser and you are clearly very talented.
I have to say, if money were no object, I'd go with the real deal. Yes, it's worth it because even an inlaid mirror takes artisans over two weeks to complete. When you think of the skill, time and effort involved in producing those pieces and the fact that they will be heirlooms one day, I personally would save up and wait.
Having said that, for your girls room, the dresser you painted is appropriate and lovely. You definitely have a steady hand!
This is gorgeous! I have no patience for painting so am in complete awe of this project!
ReplyDeleteI am in love with this. Well done.
ReplyDeleteAmazing. Just amazing. I love it! By the way, I posted about your DIY toy chest on blogtownmom.mom. Thank you!
ReplyDeleteTalk about perking up a little 'ole dresser, it couldn't be more CHARMING! Those lucky girls!!
ReplyDeleteshut. your. damn. DIY mouth!!!!!!!!!
ReplyDeleteThis is awesome! I cannot believe you painted this; it looks so good. You could've tricked me too!
ReplyDeletethis is AMAZING! I've been thinking of trying a bone inlay DIY for awhile now but didn't think I could pull it off. You've given me the inspiration now!!
ReplyDeleteA-m-a-z-i-n-g. You are sooo talented!!! The dresser looks amazing and it's so much nicer to be able to add your own personal touch and to get the kids involved in something that is theres. Question... I painted a great table I found on the streets of NYC and I totally messed it up by using a primer mixed with paint which I learned the hard way is not a good idea. How do I start over? Should I sand it down again?
ReplyDeleteLove the Dresser DIY and am glad Gracie and girls are doing well - it's so great that you include them in your work!
ReplyDeleteThat is so pretty! I would never have the patience to do it...but maybe I'll add it to my bucket list!
ReplyDeletehttp://fromfreyawithlove.blogspot.com/
*Gasp* That is amazing!!! Wow...good for you!!!
ReplyDeleteLemanie's Randomness Blog
INCREDIBLE!!
ReplyDelete--deb
OMG it looks amazing! you did a fantastic job and it looks great in the room. I am not sure I would have had the guts to do that!
ReplyDeleteWow, Jenny, this is beautiful. I bet your hand felt tired after all that detail work! Do you think it would work on a smaller piece as well?
ReplyDeleteI can't imagine pulling that off free hand but you did it perfectly. It's a lovely transformation!
ReplyDeleteCan I get your opinion of the Acrylic Enamel? I'm getting ready to paint some furniture (coffee and side table) and was going to go with oil based paint based on your previous raves about oil. Do you think you get results as good with the acrylic as you do with oil?
So lovely Jenny!
ReplyDeleteYou did a great job, and something that your children will always cherish.
WOW!
ReplyDeleteLove how it turned out!!!!
NO WAY!!!! This is GORGEOUS!!! Never seize to amaze me....love, love....
ReplyDeleteI think there is so much more satisfaction in pulling off a great DIY than in spending big bucks. It just means you are smarter.
ReplyDeleteHoly GORGEOUS!!!! Wow! I love it so much! Lucky girls. I'm so glad she is feeling better too. I will have to give this paint a try too, especially since my state doesn't carry the bm advnace line yet.
ReplyDeleteGorgeous!!! you are so talented. If you arent too sure about free hand, Kim Myles just came out with a faux-inlay stencil!!!
ReplyDeleteAbsolutely phenomenal, Jenny! Did you seal the piece with anything after you finished?
ReplyDeleteSeriously?? you are amazing! This is incredible!
ReplyDeleteWow, the dresser looks fantastic! I admire your patience. By the way, have you checked out the inlay furniture stencil by Kim Myles at http://www.cuttingedgestencils.com/indian-inlay-stencil-furniture.html?
ReplyDeleteSLOW CLAP.
ReplyDeleteAmazing.
this is beyond fantastic....love it!
ReplyDeleteAbsolutely beautiful! I love real inlay, but this is a gorgeous piece. Great job!
ReplyDeleteI wasn't convinced by the first photo, honestly thought "Mmmm..." but the overall end result is outstanding. You are an incredible mom as I'm not certain I would have ever done the same for my kiddies! at least w/o every other minute of "Careful,CAREFUL!!!" Would you consider a glass top to protect all that lovely work?
ReplyDeleteBeautiful! You are so talented. On a side note, Cutting Edge Stencils has a new inlay stencil designed my Kim Myles you might be interested in. I saw someone contemplating it for a rug.
ReplyDeleteJenny!! that is insanely beautiful!!! i never fail to leave your blog crazy inspired to go do something. Hope your sweet fam continues to mend over the weekend!
ReplyDeleteI love it! The dresser is so cool on its own but the paint really makes AWESOME! You have just planted a painting seed in my brain...what can I paint?? :)
ReplyDeleteOh wow, amazing! I love it! You are so talented and your blog is one of my favorite things. So inspiring!
ReplyDeleteYour girls' room is so pretty - have you done a tour of their room (would you be willing to if you haven't already?) Their bedding is so pretty and I'd love to see more of their big girl room!
This looks sooo good! I can't believe this a is DIY project! Ah-mazing!
ReplyDeleteOh my goodness! I can't believe you free handed that. Amazing job!
ReplyDeleteWhitney
whitneykaye@gmail.com
Fantastic faux finish, especially for a little girls' room. Looking at your process pictures conjured long forgotten memories of my mum and her best friend toll painting back in the 80s. Their work was not as stylish; but I am inspired to rework a dresser in much need of a remake! Thanks!
ReplyDeleteYou're craaazy! I can't believe you did this! Your daughters are very lucky to have a mom who spends so much time on their room.
ReplyDeleteI'll confess that at first I was kind of doubtful this would look nice, but I'll happily admit how wrong I was to doubt. It really looks adorable, and you've given me a new dresser possibility to consider for my daughter's room! Thanks!
ReplyDeleteWow! I love your work, but this is by far one of my favorites. I absolutely love that you have such a high style eye, but that you're down to earth enough to make high style accessible on a reasonable budget.
ReplyDeleteGORGEOUS GORGEOUS GORGEOUS! Glad your little one is on the mend.
ReplyDeletei love the look of yours so much better than the real thing- how friggin cute for a kids room!!
ReplyDeleteThat's fantastic. I like your version better than the real inlay type. I am inspired!
ReplyDeleteI am constantly in awe of your style, design aesthetic and pure craftiness! Love your blog!! I just did a Blog Crush post on Little Green Notebook for my blog- check it out!
ReplyDeletehttp://youareagoodone.blogspot.com/2012/04/blog-crush_20.html
Wow, fantastic work. I recently repainted some drawer pulls for a credenza (http://monochromaticdynamic.blogspot.com/2012/02/knobby-need.html), but haven't decided how to treat the credenza--I don't think I'm cut out for doing a painted DIY inlay, but this is definitely inspiring!
ReplyDeleteSo well done! I love the imperfections and this makes it even more lovely! Folk art at it's best! Your little folks did a great job on the backside too....
ReplyDeleteGreat job - especially free hand! The colour is wonderful and the dresser had a great shape to begin with!
ReplyDeleteIs there any way you could share the name of the font you used for the paint names? It's lovely!
ReplyDeleteGORGEOUS! Love. Just, love.
ReplyDeleteFabulous Jenny! I wish I was as confident in my doodle skillz!
ReplyDeleteOk, so I've decided that you are way too crazy talented in the free hand painting category. I could never pull off something like that! I just don't have the skills. It looks soooo pretty, and I absolutely LOVE your combination of colors. I wouldn't think to put that pale lilac against the bright fuschia of the headboard but it looks fabulous. I'm learning so much about color from your blog and I'm doing my best to be brave and mix pattern, old and new furnishings, and varying styles. I'm still pretty nervous but taking chances. Thanks for the constant inspiration. And please keep being thrifty as it reminds me to keep my feet on the ground and come up with a different solution or plan instead of just dishing out the dough. happy weekend!
ReplyDeleteWhat an incredible job!! It looks just like the real thing! Did you put any type of sealer over it when you were finished to protect the paint job at all?
ReplyDeletethat looks awesome!!! I'm so inspired!
ReplyDeletejenny, you never cease to amaze me! seriously incredible and so inspiring. i'm eying the vintage nightstands i saved from the trash room in my building...
ReplyDeleteI love it! It looks amazing and I feel so inspired to try it some day!
ReplyDeleteaaahhh! these looks amazing!!! would love to try this for my little one's room!!
ReplyDeleteYou are one INCREDIBLE gal!!! This is a fantastic re-do!!! Talk about bringing it into the 21st century!!! WOW!!!
ReplyDeleteJenny you just amaze me so! You accomplish so much and that inspires me. I want to fly you to hawaii so we can be best friends :)
ReplyDeleteI would love to work on a project like this! And you're right, when creating an all over design like this it doesn't ahem the be perfect because the overall look is what pulls it together. Super sweet.
ReplyDeleteSimply.
ReplyDeleteAmazing.
This is ridiculously good looking! Is there anything you can't do?!? ;) Such the perfect touch for your girls room! Love it!
ReplyDeleteAnnie
House on Rene
you did a beautiful job, it looks great!!
ReplyDeleteIt is beautiful! You did an amazing job!! Now you have me thinking...
ReplyDeleteCheers!
OMG, that chest is GORGEOUS!! I need it for my own home. You could sell that thing for a fortune!!
ReplyDeleteWOW! I would never have had the patience to do this. It looks amazing!
ReplyDeleteJenny-
ReplyDeletethis is simply LOVELY- the allover pattern is what makes this piece so insanley interesting and complex- LOVE IT
All I can say is WOW! I am in complete awe of your talent!
ReplyDeleteLe sigh...It's beautiful!
ReplyDeleteAmazing! It was so sweet to see the kids join in.
ReplyDeleteOh. Wow! Jenny, you always amaze me with what you can come up with!!! That dresser looks amazing.
ReplyDeleteJennie,
ReplyDeleteLove it. I lived in India for three years and often thought about getting the bone inlaid furniture. It was a fairly decent price at the time. Instead, I just bought a small box. I do love what you have done. Terrific idea. I will try it myself. Some of us just need more encouragement.
The colours and "doodling" are beautiful! My favourite bit has to be the sneak peek at what was happening behind the dresser though! Sweet, and looks like many more gorgeous things will be made in years to come :)
ReplyDeleteThe dresser is fabulous. Your girls will be fighting over who gets it in years to come. Did you seal it with something? Did you need to treat the glass knobs with anything special for the paint to stick? As always, thanks for the inspiration.
ReplyDeleteBeautiful!!
ReplyDeleteGorgeous gorgeous gorgeous!
ReplyDeleteYou never cease to amaze me! You have such a talent!
ReplyDeleteEven better than the real thing! Your vision for what things can be is really inspiring and the execution is top notch. Your girls are going to have memories of all the special pieces their mom made.
ReplyDeleteJenny I don't think I could be any more amazed!! I would love to try this. The pattern is gorgeous as well as the color palette!! Bravo!!
ReplyDeleteI hope you can make it over for my $100 Soft Surroundings Giveaway!
xoxo
Karena
Art by Karena
I've wanted to try the same trick too! (but have been too scared to just go for it) you have inspired me. This is absolutely beautiful. Bravo! Also, did you snag that black and gold jacket number on the rack next to the dresser at the flea market too? I zeroed in on that little baby.
ReplyDeleteJenny, so gorgeous! Your energy and vision is so amazing.
ReplyDeleteGlad your little one is feeling better.
It's so cute and perfect for your girls' room...and I love that it's a project that doesn't require perfection!
ReplyDeleteit looks incredible! i wish, i had such talent :)
ReplyDeleteThis is genius! Beautiful work, the headboard in the last photo, was that a project of yours? I want to hear more about it! I LOVE IT!!!!!!!
ReplyDeleteRachel
revolvingmarket.blogspot.com
FABULOUS!!!
ReplyDeleteJenny,
ReplyDeleteLOVE LOVE! I am gonna copy you and try this for my granddaughter's nightstand.
You've done it again! I can't believe you did this all free hand and this is the result. Bravo!!! xoxo
ReplyDeleteHoly cow!! Your finished dresser turned out AMAZING. Excuse me while I just here and just stare and drool for a little while.
ReplyDeleteWow...simply stunning!
ReplyDeleteWow! You are crazy talented. I would think that it would look to busy, but it doesn't since it's all that creamy white on the soft lilac color. Gorgeous! I love that your girls painted on the back.
ReplyDeleteWow great job! It looks just like bone inlay! That really is impressive. You are so talented.
ReplyDeleteJenny I rarely leave comments on blogs. Lazy I guess. But I must tell you I am inspired by 100% of your posts. And you are my style icon! oh and FYI I am not ashamed to say I'm a copy cat. My house is beginning to mimic yours one project at a time.
ReplyDeleteHi Jenny,
ReplyDeleteI wanted to add this link to an indian inlay stencil that you might be interested in for future projects: http://www.cuttingedgestencils.com/indian-inlay-stencil-furniture.html?category_id=1009
However, I think your own freehand painting is wonderful! Thanks for inspiring me to be more vividly imaginative with my space!
Jenny, this is amazing! Totally inspired. I have been trying to figure out what to do in my step-daughter's room for some pattern play....this might be just it! Thanks for the inspiration!
ReplyDeleteThat turned out so pretty! My 4 y.o. just saw it and is now begging me for one (purple is her fav). This reminded me of a pretty painted chest I once saw in a boutique-y antique store in Charlottesville, VA. It was a very plain chest that was sort of trompe l'oeil painted to look like faux bamboo furniture.
ReplyDeleteI am dying and drooling!!! This is my favorite DIY that you've done EVER!! And I think I've seen most of them. Once you added the detail everywhere it took it to the next level. Had you just done the drawers, or left more negative space it would have looked folksy.
ReplyDeleteOver-the-top GORGEOUS!!
Looks amazing! If I didn't know any better I would think that this was the real thing!
ReplyDeleteXO,
Kristy
www.idesignlove.com
So beautiful. Right now I am making a little room for my two girls to share, well I am in the beginning stages. I have been on the hunt for beds for weeks. I noticed your girlies pink upholstered bed and they are exactly what I am looking for. Any suggestions that won't break the bank. I have been scouring my craigslist and thrift stores with no luck of any pairs.
ReplyDeleteThere is simply nothing that you can't do, is there! The dresser is absolutely lovely and lovelier still is that you let your sweet girls in on the action. Did their handiwork remain?
ReplyDeleteAs usual, bravo!
WOW, oh, WOW!!! That is so impressive. I just love that.
ReplyDeleteWOW, oh, WOW!!! That is so impressive. I just love that.
ReplyDeleteYour dresser is amazing. It's just perfect for a girl's room. I saw you featured over at Isabella and Max's Room.
ReplyDeleteWOW!!! This is just amazing! You are seriously one talented lady!
ReplyDeleteAmazing job! That is really beautiful! Love your kids got involved!
ReplyDeleteJenny, you have made this piece into a truly beautifully whimsical piece! I am sure that when your daughters are grown it will be a treasured one they will long remember.
ReplyDeleteAre you going to do anything to the inside of the drawers?
Wow! You did an amazing job! Did you have something to look at or did you just wing it? If so, you have an incredible eye!
ReplyDeleteJenny, I've said it before but I'll say it again - you are a genius! That looks fantastic, what lucky little ladies.
ReplyDeleteAbsolutely amazing!! Looks stunning, and your color combo just adds to the effect!
ReplyDeleteJust found you via Janelle at Isabella and Max and I am hooked -- your dresser is awesome and the idea is going into my mental file for a future project for sure - Thanks for sharing!!!
ReplyDeleteLove this.
ReplyDeleteYou are a DIY-machine! Someone needs to figure out how to 'bottle' that kind of flair.
absolutely gorgeous!!
ReplyDeleteThis comment has been removed by the author.
ReplyDeleteHow do you go from the 2 screw drawer pulls down to the 1 screw knobs? This is beautiful and looks fun!
ReplyDeleteOk I LOVE THIS! i want to do something like this but i have a little man and this feels really feminine for a boys room... would you have any ideas on how to do this but in a more masculine pattern?
ReplyDeletewow, you are my hero!! I was just googling to see if anyone had tried this DIY, and there you were. I LOVE it! beautiful work! and now I am inspired to do it for my own dresser. Mostly likely green or blue as a base. :)
ReplyDeleteJust gorgeous Jenny - you've done an amazing job! I've got this linked to my dressers post as well today, for inspiration!
ReplyDeleteGorgeous job on the dresser!!!! Makes me want to paint my antique dresser the same way!!!
ReplyDeletebeautiful! ive been taking old finds and revamping them for years- i have a smaller 4 drawer im working on now and was wondering what difficulties one commentor had with using paint/primer combo. since im also repainting my house i have tons of this sort of paint. ill be doing distressing work to the dresser but hadnt attempted using p/p mix before.
ReplyDeletegreat work! just saw a dresser yesterday that was a definite diy at a high-end gift shop marked down to $798.00. i was shocked and proud im a self made diy'er. tutorials like yours can really help many save money.
spread the knowledge/keep calm & paint on!
HOLY COW - I just saw this dresser in today's post where you did the red lamp for girls room. I thought it was gorgeous there and so I started searching your site on it. I can't believe you did this!!!! It is beautiful and I love it so much. Seriously, my house is going to turn into a wannabe-Jenny-of-LGN!!!!
ReplyDelete