You'll still use the mini-blinds mechanism for the base (which helps keep the cost of this project way down), but the vinyl slats get ditched. The result is a slightly more relaxed shade, which I often prefer over perfectly stacked flat folds of fabric that look a little too-uptight or something. Also, I usually suggest a linen for DIY-ing roman shades because the loose weave is super forgiving for those of us that struggle to cut an exactly straight line. :)

Okay, let's jump in!
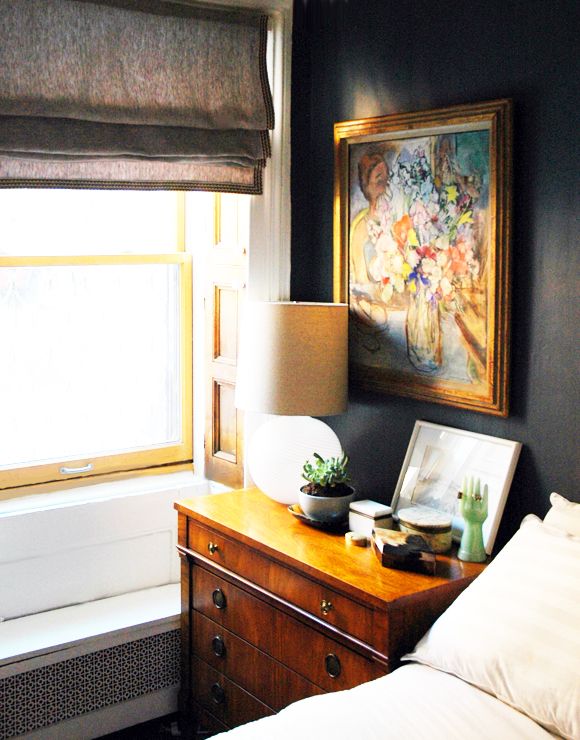
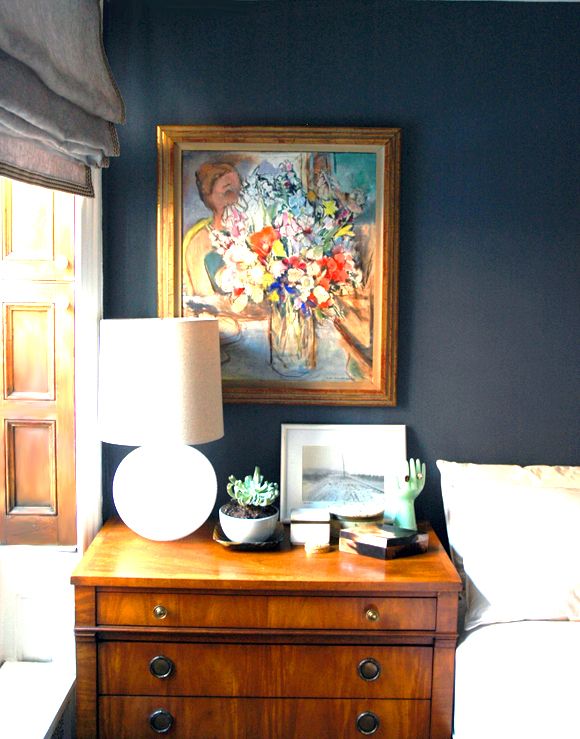
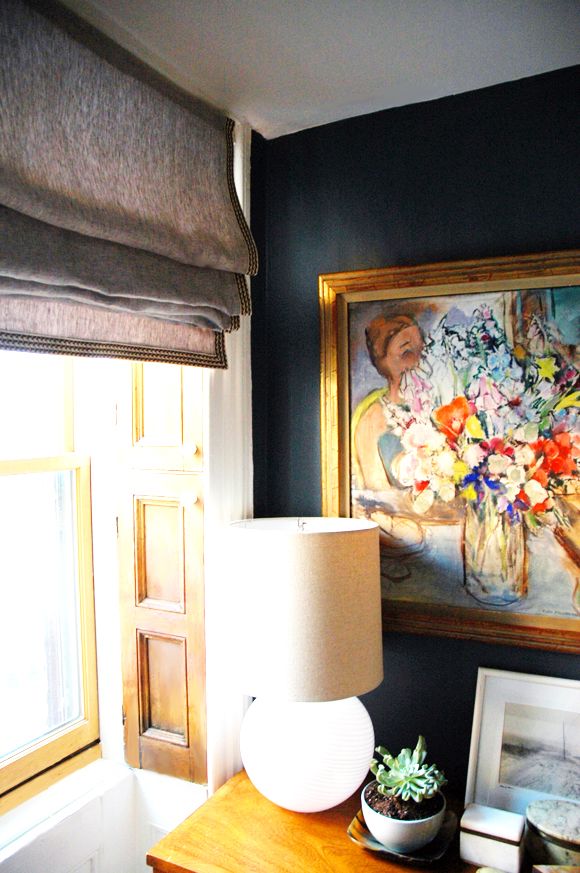
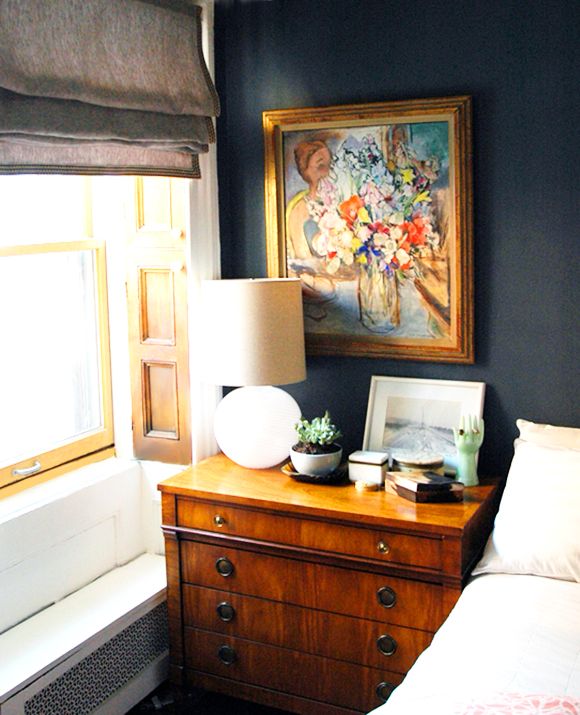
As you can tell from the photos, I ended up going dark on the walls in our master bedroom. The color is Benjamin Moore's Anchor Gray. I'm in love - it's really pretty and moody. I wanted to find some fabric for shades that complimented the wall color, but that was still in on the lighter side. I popped into Mood and they had this really pretty linen from a Marc Jacobs line that called to me from across the room. (one of my favorite things about Mood is they often tell you what fashion house made and used the fabric first - the printed silk section is OUT OF THIS WORLD)


And then along the top and bottom of the shade, I folded about an inch of fabric, twice, so that the raw edge is hidden:

3) If you don't want to line your shade, go ahead and skip this step. I chose a lighter liner (just some mid-weight white cotton, really) that wouldn't really block the light, but just sort of give it a nice filter. It also helps the shade look better from the outside of the house. You can do a black-out liner here if you want. Be sure to use a heavy-duty gauge sewing needle on your machine, though, if you do.
You can cut the liner out to be pretty close to the dimensions of your finished shade. You just tuck the liner under the seams of your shade fabric so no raw edges show. Pin everything in place.

4) Sew along the perimeter of the shade - just one big rectangle. And that's it for the machine sewing!

5) Pull out your mini blinds (remember to keep the mounting hardware!) and completely cut off the heavy slat at the bottom. Snip all the strings.

Then snip off all the ladder-shaped strings, being careful not to cut the cord. Pull off all the slats and the ladder strings so that you're left with only the top mechanism and the thicker cording.

6) Lay your shade fabric face down with your mini blinds mechanism and cords laying on top in place. Using the cords as your guide, mark out where you want your fold lines to be (I just drew little X's with a pencil).
I think a 10" gap makes for a nice fold size. Here's an important part though: I wanted there to be a bit of a drop on the bottom of my shade so that the trim wouldn't be hidden by the folds. So I made a mark at 8" above the bottom of my fabric. (this will make more sense in a second)

7) Sew one of these little drapery rings at each of your markings, or basically where the cord meets the fold lines.

I used invisible thread and stitched all the way through to the front of the shade. My shade is pretty wide, so there are three cords in the mini-blinds mechanism, so I ended up sewing 18 plastic rings on by hand. This is by far the most tedious part of the project, but it should only take about an hour. If your shade is shorter, you'll probably only have two cords and much less ring-sewing to do.

8) I used a small slat of flat, 1" wide wood and three very small eyelet screws to make the bottom part of the shade.

9) Glue the bottom slat 8" above the true bottom of the shade, so that the folds would not cover the trim. Be generous with the fabric glue, but make sure there's no seepage happening through the front of the fabric.
(also, you can sort of see the line of three plastic rings sewn in place here, 10" above the bottom wooden slat)

Also glue the top mechanism to the top of the shade. You'll want to leave a little bit of fabric on the top and sides (I should have left more room on the sides). Also, make sure your cord is coming out of the back of the mechanism and isn't glued down to the fabric.

10) Thread your cords through all the tacked down plastic rings and then tie the cord to the eyelet screws in your bottom slat.

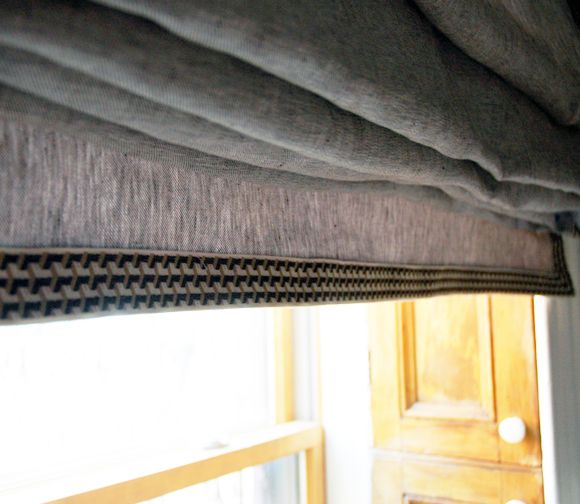
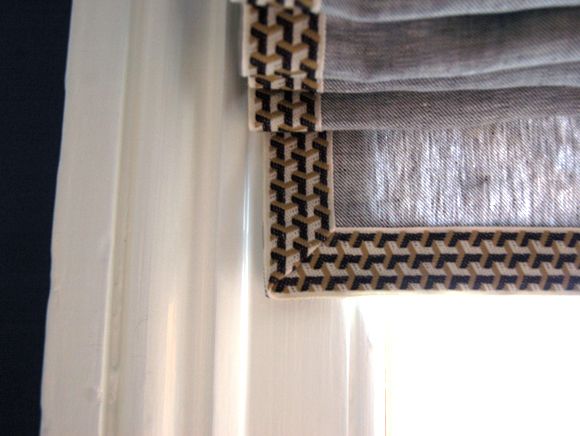
Then just hang your shades like you would a mini-blind, using the mounting hardware that came with the blinds, and you're DONE! Unless you want to add trim like I did, but that's just a matter of a quick line of fabric glue. I usually do shade trim in a U-shape so the top of the shade has no trim.
The biggest benefit of this approach over the no-sew version is there are no ugly mini-blind slats peeking through the fabric. And the finished product is probably more durable.
I love how soft and relaxed the linen looks and I think it works for my space, but if you're looking for perfectly straight folds with no slouching at all, you'll have to sew in wooden dowels along every fold. I've done it once before and it was about three times the amount of work and ten times the cost of these relaxed shades, but they are really lovely.
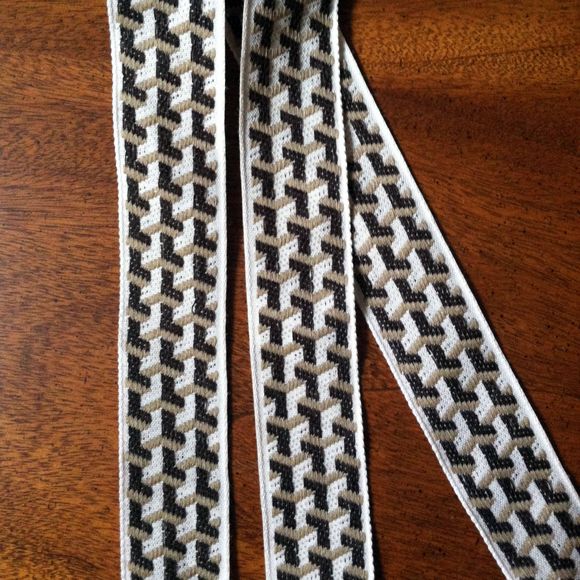
It is SO nice to have window treatments up so we don't have to keep the shutters closed all the time! And seriously, isn't this trim just perfect? So worth the wait to use it here!
PS Don't forget to vote! Thanks again!! :)
A friend of mine pointed out your blog to me last summer and I have been following you ever since. I love all your diy posts. They are always full of innovative ideas and your tutorials are terrific!!
ReplyDeleteFrom the outdoor play house structure to the AWESOME - if temporary - mint spray painted out door lamps to all your terrific IKEA hacks. I just love them all!!
You've got my vote!!!
Best of luck to you!,
Katja @ ShiftCtrlART.com
Jenny-
ReplyDeleteI've used your tutorial several times for these and always wondered - how does your top portion stay inside the mounting brackets without using those little clips to hold it all together? I've had to make a make-shift valence and glue it across the front to keep those clips from showing (and that looks great and really finishes it out). Just curious what you do..if this even makes sense!
Love your blog and read it daily. Though I dont think I have ever commented :)
Thanks for all the inspiration
Every time I read your blog, I think "Man, she's so smart!" Brilliant, really. I am amazed. Thank you for continuously sharing all of your fabulous DIY projects. Hope you are feeling fully back to yourself after your wire table tetanus incident :(
ReplyDeleteWow, this is a great step-by-step tutorial. I'm always a little confused and scared about how to make these, but with this tutorial I really want to give these a try now! Great job!
ReplyDeleteYou seriously just SAVED me!! I am doing a project and want roman shades so badly but they need to look really good from the outside too. Thank you sooooooo much! I really hope you win, you deserve it!
ReplyDeleteFabulous post! I love your choice of fabric and trim for the shades. I also couldn't help buy notice that beautiful painting next to your bed. It's stunning! I want one for my own home.
ReplyDeleteVote in! And I'm loving those shades! Great work!
ReplyDeleteLove this! + can't wait to see the rest of your bedroom!
ReplyDeleteLove this. Might have to try this for the ORC!! Love your shade and that trim!
ReplyDeletexo Nancy
Powellbrowerhome.com
I just tried your previous tutorial and was frustrated by the bottom bit. This is perfect!
ReplyDeleteJenny Jenny Jenny why you always blowing my mind girl!
ReplyDeleteI can totally do this! I love tutorials that I don't have to go buy a single thing for!
Love the tutorial, it's great. Also every single time I read one of your posts I drool over your art in your house. Every single piece is to die for.
ReplyDeleteThis project is on my to-do list! Thanks for the tutorial!
ReplyDeleteJenny, you are amazing :) Love your master bedroom and this project! And of course I voted for you (because you are the best!) xoxo
ReplyDeleteI'm not a big DIY person (no time), but can I tell you how much I ADORE the combination of the wall color you chose, that nightstand and how you've styled it, the painting, the shutters, and those shades? It's the most gorgeous, harmonious, satisfying combination of colors and textures. Completely brilliant!
ReplyDeleteWow! Jenny, this looks so great and I really love the trim detail. I am signing up for Apartment Therapy just to give you my vote!
ReplyDeleteGreat update! I've used the old tutorial for lots of treatments but this will definitely look nicer from the back. One other issue I had was the slats breaking if I used even a medium weight fabric; I found that layering 3 or 4 slats and gluing them together helped with that.
ReplyDeleteYou are brilliant- that's all I can say!
ReplyDeleteJenny, just wanted to chime in and tell you how much I love your work. You are absolutely my first and favorite stop. You really have the most amazing eye and I appreciate the amount of reasonably priced options you throw out here in blog land.
ReplyDeleteHeather's room is just breathtaking, but that's no surprise to anyone. You make having a truly beautiful home look so easy!
Voted for ya. Thanks for the continual inspiration to make something better.
I signed up and voted for you - good luck!
ReplyDeleteI've also used your old method before (aww I miss those shades in our old apartment kitchen!) but I love that these are so clean to the outside. Think I have another window to do this for so I can't wait to try it.
ReplyDeleteI have used your tutorial already 3 times! The movers from our recent move were pretty rough on the shades and the plastic slats got ripped. So glad to know I can find a way to make the shades work again! Love the fabric and trim!
ReplyDeleteOoh, great update! I never followed your previous tutorial because I wanted a neat look from the outside, but this one I am going to get on, pronto.
ReplyDeleteI have one more shortcut for you: the weight of the folds/shade is held only by the screw eyes (or, if not using screw eyes, the bottom row of rings). Net, these are the only rings that need to be REALLY secure. . . the rest are just guides! I fold the shade in on itself, right sides together, at each place I want a row of rings and PRESS. Then I put this fold under my presser foot and set the ring right next to it. Use a zero length zig zag stitch on your machine and catch the fabric/ring five or six times. Snip and move to next ring on that fold line. When you're done with that row, refold and do another. When you're all done you can use glue to make sure the stitches don't unravel (they won't, but just in case!)
Sounds complicated as I write it but it is MUCH faster than hand stitching! You can either use thread matching the face fabric or use sharpies to color the thread if your fabric is a print. Try it - all your rings will be done in 15 minutes, tops, even for a big shade.
you definitely got my vote!!
ReplyDeleteand i love this idea of making roman shades our of blinds!! I feel bad "wasting" the mini blinds in my kitchen bay windows... so this may be just the perfect project that i was putting off... :-)
also, LOVE that wooden dresser next to bed. that is exactly what i've been searching for (i also have a dark bedroom -- FB's Down Pipe). what kind of keyword searches would you use to describe that dresser? i've been looking on craigslist/ksl. Thanks!
This is genius. Thank you for making it so easy! And, just voted. BANG! Good luck!
ReplyDeleteYour post couldn't have come at a better time! I've been putting this project off and you've reinspired me, thanks.
ReplyDeleteI'm pretty sure I first found you through that original tutorial all those posts ago. Still a great project, I've done it a couple of times myself (our house has old, non-standard windows which were ALL fitted with vinyl blinds when we moved in). I sewed up the rectangle when I did it most recently, and I definitely think that is the way to go!
ReplyDeletePerfect timing - I am about to take down my first pair of shades (made using your tutorial) to recover and thought I would need new blinds. So now I should be able to just reuse the mini-blinds and get rid of the slats and add in a backing after I finally pick a fabric. Thank-you!
ReplyDeleteSuch a great tutorial. You've made it sound simple enough I think I can try it! :)
ReplyDeleteSo great Jenny! Yeah, the ones I made from the last tutorial looked pretty DIYed, I don't have your gift and was way too heavy with the glue. Not that you'll see this, but I would LOVE to see a pic of them down. Maybe a one day follow up to your follow up. Good luck with AT, I voted for you yesterday!
ReplyDeleteThey turned out great! Our kitchen cabinets are actually painted BM Anchor Gray! I love it and it looks equally as wonderful on your walls. And the dresser/nightstand looks fantastic against the walls as well. Totally my kinda bedroom. You're always so inspiring. Thank you for bring a constant source if inspiration for me.
ReplyDeleteDid you end up using Cabbage White in the common areas?
ReplyDeleteI love this tutorial! I have mini-blinds in my basement waiting to be tossed but now I'll put them to good use. Thanks so much,Jenny. You have my vote!
ReplyDeleteMaggie
Just stumbled upon the Homies and was so excited for you I had to do a FB P.S.A. Good luck girl, you deserve both categories!
ReplyDeleteThis is brilliant!! Totally trying this!
ReplyDeleteLove this blog!
Follow me @ http://kristenthomasenluxe.blogspot.com/
Lovely post and tutorial! Thanks for sharing!
ReplyDeleteThanks for this very well done tutorials! YOur bedroom is stunning... you really piecked just the perfect fabric for the walls. I think "moody" is such a romantic world for the mood of your room.
ReplyDeleteStunning!
I have a weekly tutorial called TUTORIALS TIPS AND TIDBITS. The link goes up every Wednesday at 8:00 pm. I hope you will join in!
love this project - I work make window treatments for a living and just wanted to offer a tip to save some work. You can sew on your rings using a bartack on your machine - most machines you can just set it to zig-zag and the length to zero. If you don't have a miniblind mechanism just use a small board and put screw eyes in it - you can feed through your cording and tie it off on the wall (just hang it with some L brackets)
ReplyDeleteHi Jenny,
ReplyDeleteJust had to jump in on the LGN love-fest. I have been a stalker on your site for probably 2 years now. Whenever I need inspiration, diy guidance or just want to look at some gorgeous home design pics, your blog is where I go first, and you never disappoint. I have used several of your tutorials and ideas in my own home, with great results (or so I think! :) ) If you run out of ideas one of these days, we readers would be sad, but could hardly blame you...your output is already super-human! Thanks for your contribution to the home design blogosphere--you have my vote.
Kelly
You have both my votes!
ReplyDeleteSo enjoying the progress on your place!
Absolutely love the update and have voted for you on Apartment Therapy!
ReplyDeleteThat trim is great, love the perfectly mitered corner. Also, gorgeous lamp against the dark wall.
ReplyDeleteI love those sneak peeks into your new house!
ReplyDeleteJust registered at Apartment Therapy to vote for you. Good luck!
ReplyDeleteOh, I was so wrong on the instagram pic! but my goodness am I ever happy! these look fabulous!
ReplyDeleteSuch a lovely idea. Like your side tables too. Tried to vote for you but it wouldn't let me. Seems like you're gonna win!!
ReplyDeleteThanks so much for this revised tutorial, I am gonna try it sometime soon :)
ReplyDeleteLiz
I've always felt baffled and intimidated by DIY roman shades! No more! Once again, you rock my crafty world. :) I created an Apartment Therapy account just to vote for you. You are just that awesome. You genuinely deserve to win. I hope you do.
ReplyDeleteJust pinned your outstanding blog while I am searching for Glass Doors designs, thanks for sharing.
ReplyDeleteHi! I have had making roman shades on my "To Do" for a while and you have just made the task so much easier! I see a weekend project coming up. Thanks for sharing.
ReplyDeletehavenot read thru all the comments
ReplyDeletebut if not mentioned, there is a special tape with the ring hooks ALREADY SEWN ON that you can buy.
used to get mine at the great shop on West 57th Street - GREENBERGS, sadly long gone. But somebody in the Garment district will have them ... look for a ribbon and notions type shop
Life saver and turns making these into even easier!
One word to describe wonderful
ReplyDeleteOMG!! I so love your blog! I desperately need to make these for my bedroom. I was always confused with all the parts, but using cheap plastic blinds as the base is brilliant!!
ReplyDeleteYou are so talented and have great ideas. I'm loving your living/family room. It's looking amazing. I so wish you could help me. You really are talented and have a great eye. It's very hard to do the soft creams with sea grass look and the cool NY contemporary/trad look with some fun. I mean by one person. And you can do it all. Thanks for always sharing your fantastic sources and paint colors. I OMG love your blog. Congrats on homies. I'm still waiting for that post where you share you won them!
ReplyDeleteKaren
Thank you thank you for saving my Roman Shades. I too had made them with the slats. They looked horrible but had put so much work into them I couldn't stand to throw them away....I put on the rings and I actually used the bottom of the blinds as my "wooden" slate. Put the eye hooks in there...even more $$ savings. They now look fabulous..Thanks Again
ReplyDelete