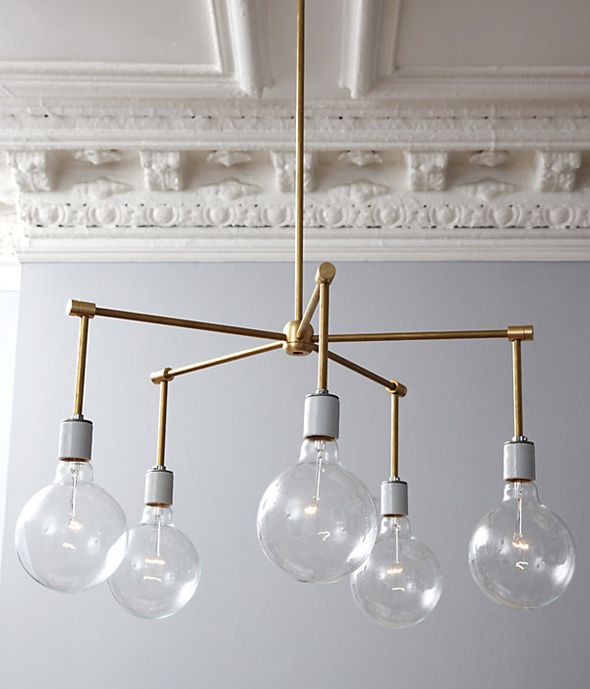
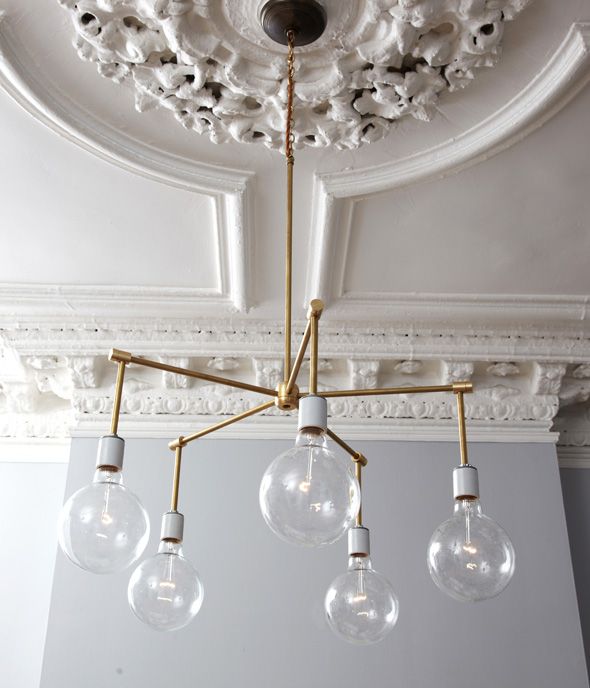
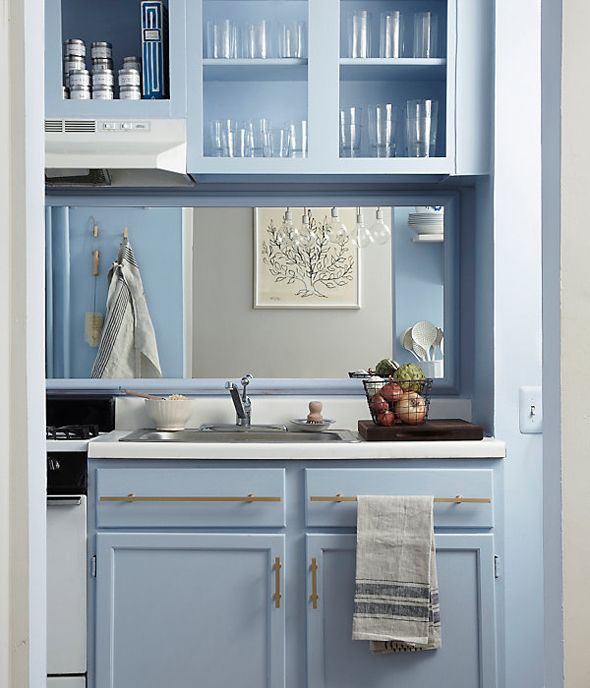
SO many of you guys were excited about the DIY brass chandelier that the OKL team shared in this kitchen. Well, lucky for us, they've put together a full tutorial here to share with LGN readers (there's also a post here on the OKL blog, which is full of great content!). Let's jump right in to Megan Pflug's tutorial:
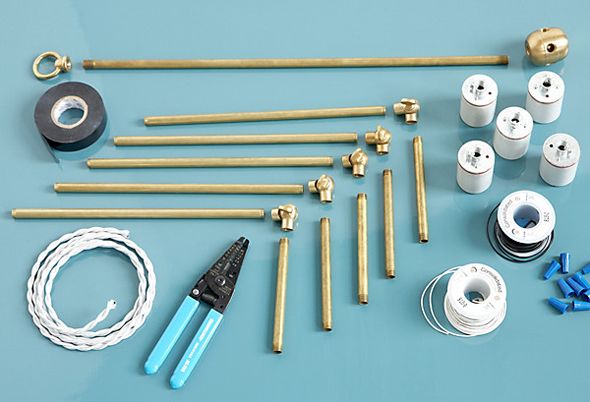 List of materials:
- 1 brass loop 1/8F IPS
- 5 5-inch brass pipes 1/8F IPS
- 5 10-inch brass pipes 1/8F IPS
- 1 18-inch brass pipe 1/8F IPS
- 5 Edison Porcelain Keyless sockets 660W-250V 1/8-27 CAP
- 5 1/8F x 1/8F IPS adjustable brass swivel
- 1 5-hole 1/8 sides x 1/8 bottom x 1/8 top large cluster body
- 5 feet of 2 wire twisted cord (more depending on sealing height)
- 5 Satco Globe Lights 40 W G40 clear (not pictured)
- 15 feet of single strand conductor wire in white (UL 1007/1569, 26 AWG, 300 VAC)
- 15 feet of single strand conductor wire in black (UL 1007/1569, 26 AWG, 300 VAC)
- One package of twist-on wire connectors 3(22 AWG) Min, 3(16 AWG) Max, 300V
- A pair of wire strippers
- 1 roll of electrical tape
- A screwdriver
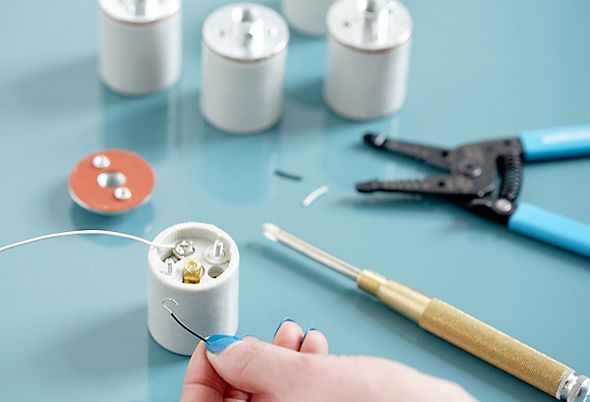
1. Unscrew the back of the socket form the ceramic body using the screws located in inside the socket opening.
2. Cut a 2-foot length of both black and white wire. Use your wire stripper to remove about 1/4 inch of the plastic sheath from the ends of each wire.
3. Twist the exposed wire ends to keep from fraying and bend them to form a hook.
4. Be sure to always attach the black wire to the gold screw and the white wire to the silver screw. Hook each wire in place around the base of each screw and tighten. Reattach the socket backing, threading the wires through the hole in the top.
5. Repeat this process for all five sockets.
Tip: Always hook the wire around the screws so that it wraps clockwise. This will help keep it in place as your screw.
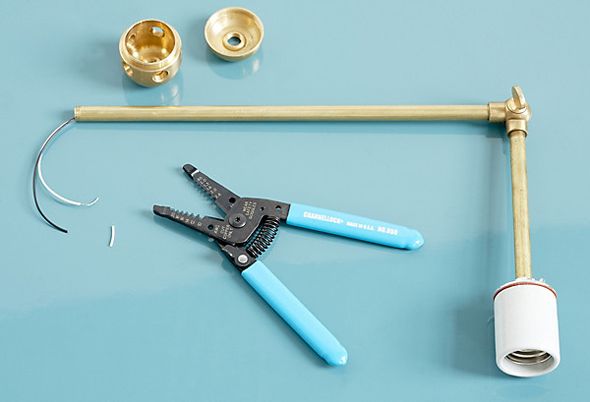
Construct The Arms:
1. Construct the brass arm by screwing it together, as shown using the 10-inch pipe, the 5-inch pipe, and the brass swivel. Screw the socket in place threading the wires all the way through to the end of the 10-inch pipe.
2. Repeat this process for all five arms.
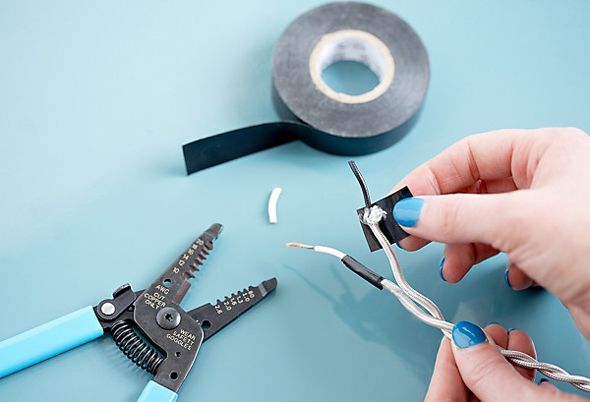
1. To prep the cloth wire, push back the cloth covering from the end and secure it with electrical tape.
2. Strip both wires about 1/2 inch from the ends.
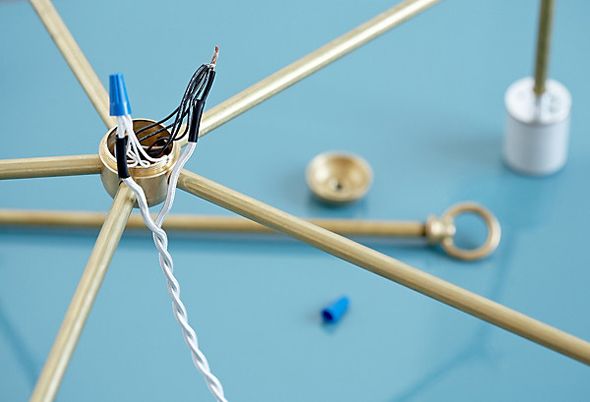
1. Join all the small white wires in the cluster body with the larger white cloth wire by twisting them together. Secure with a twist on wire connector. Repeat process with the black wires.
2. Gently push the wires inside the cluster body and reattach the cap. Thread the cloth wire through the hole in the top.
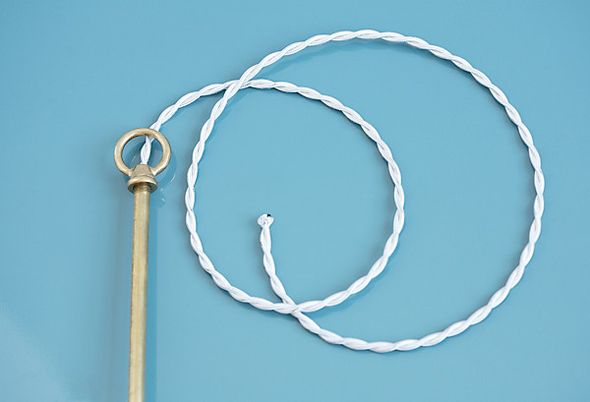
3. Thread the cloth wire through the remaining 17-inch brass pipe and screw it to the top of the cluster body.
Finish Up:
1. Screw the brass loop to the top of your 17-inch pipe.
Tip: At this point, I recommend using an electrician to install your new chandelier. You should let her or him know that you will need a brass dome canopy kit to complete the install.
Stuck on a step? The OKL team is happy to help! Email Megan at editors@onekingslane.com ask a question about this how-to.
Thanks again to the OKL team for sharing this amazing tutorial with us! I can't wait to make my own. :)
(How-To Photography: Jason Hamilton)
Thank you for the tutorial! I LOVE that chandelier! Do you have any kind of estimate on how much the parts for this would cost?
ReplyDeleteJenny, I am thrilled about this tutorial!! My husband and I are moving soon and I'll be using this and a gazillion other posts on your blog to help me make our new place feel like our own. I'm also very pumped that the NY lighting company can mail me the whole set. Just great. Thanks for making good design so accessible, as always.
ReplyDeleteWhat's the approximate cost for all the parts?
ReplyDeleteGrand Brass also has all the parts. https://www.facebook.com/GrandBrassLampParts?fref=ts
ReplyDelete@girliebeku, we made a similar chandelier using Lindsey Adelman directions, cost was around $120 with shipping from grand brass. Parts list is very similar.
ReplyDeleteTHANK YOU!!
ReplyDeleteIt's beautiful and intimidating. I'm a bit shy when it comes to electrical work. I'd love to give it a try though.
ReplyDeleteSuch a funky light! love it!
ReplyDeleteLove the finished product!!
ReplyDeletexoxo PARIS BEE kids blog
This is one of the best DIY I've seen in a while. It looks so amazing! I love anything brass.
ReplyDeletexo Quinn
Jenny ! It's beautiful and thanks for the tutorial . Can u share the approximate cost of the chandy minus the installation ? Thanks
ReplyDeleteI just noticed that a few commenters on OKL's post are saying that using 26 gauge wire is actually a fire hazard, and that nothing less than 18 gauge should be used - just thought you might want to caution your readers with that safety note! :) xo
ReplyDeleteHighlight of my day: Read through this tutorial, then got on Pinterest to see this pinned twice in a row from two different people who don't know each other.
ReplyDeletepretty thrilled you shared this! Thanks, Jenny!
ReplyDeleteLove it! When I get settled in my new place I think I will try to make this beautiful chandelier. Thank you!
ReplyDeleteI need overhead lighting in my living room but don't have a fixture I could replace do you think it would be possible to alter this somehow to lead to a plug that I could kind of swag from the ceiling to an outlet?
ReplyDeleteThis looks fantastic Jenn
ReplyDeleteSo good! I also love the cabinet hardware.
ReplyDeleteWow, this is so great!!! Thank you for this, I may have to try this soon. So talented!
ReplyDeleteThink readers in the UK may want to approach this DIY project cautiously and get it checked by an electrician before switching it on.
ReplyDeleteI had my husband make the brass Lindsey Adelman chandelier:
ReplyDeletehttp://www.lindseyadelman.com/makeit.php?item=4
Materials were about $130 if that helps anyone. I may request this one as well. Lovely!
I had my husband make the brass Lindsey Adelman chandelier:
ReplyDeletehttp://www.lindseyadelman.com/makeit.php?item=4
Materials were about $130 if that helps anyone. I may request this one as well. Lovely!