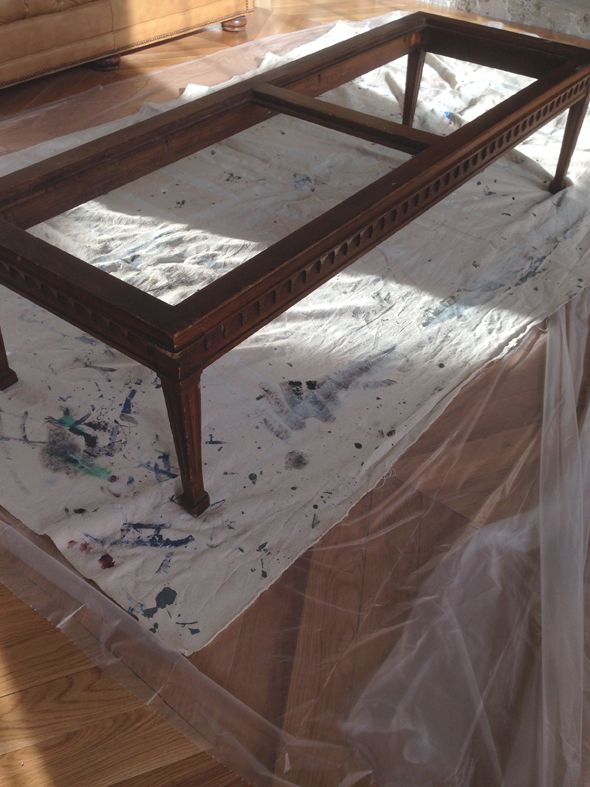
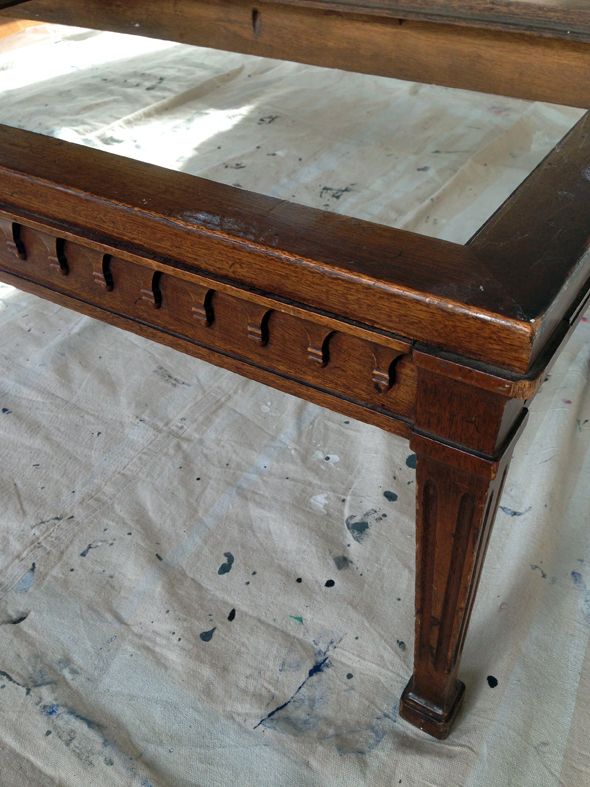
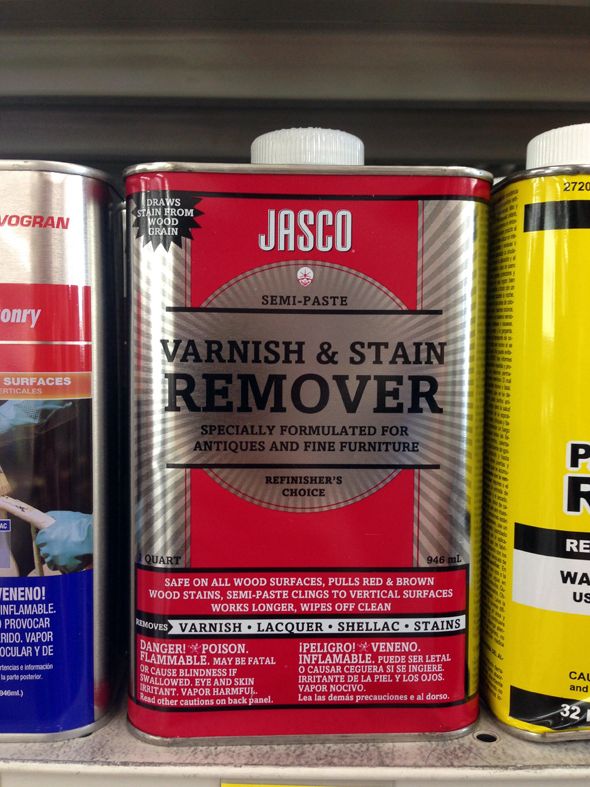
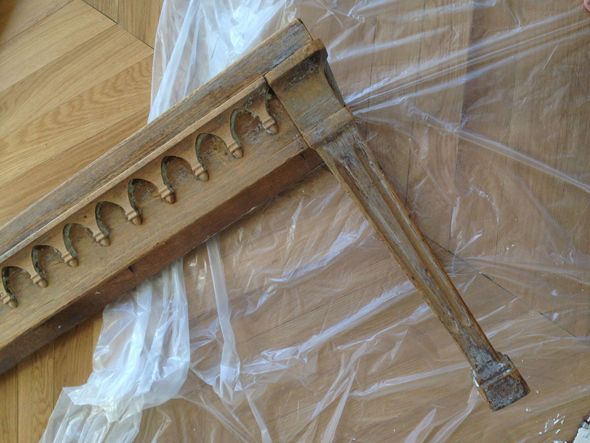
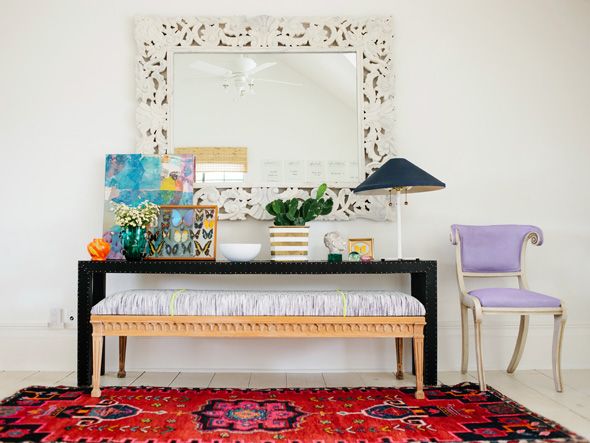
I found this coffee table at the Meeker Ave Flea Market in Brooklyn. It was stamped Dorothy Draper and I got it for only $10 because it was missing a top. Total score! The color of the stain was not my favorite so we stripped it using varnish remover first and a little bit of stripper.
This product worked pretty well to loosen up the stain and gel stripper helped to take the rest off.
The magic maker was using this Wood Bleach next. It does exactly what it sounds like it would do. It comes in a powder that you make a solution with water and use it to sort of clean the wood. The color lightens pretty quickly.
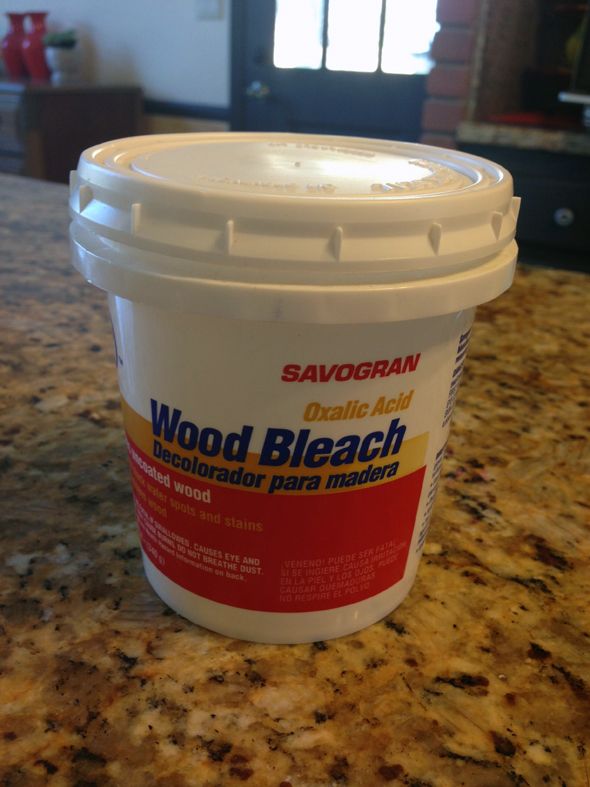
You'll definitely want to wear gloves for this part of the show. And working in a well-ventilated place is a good idea.
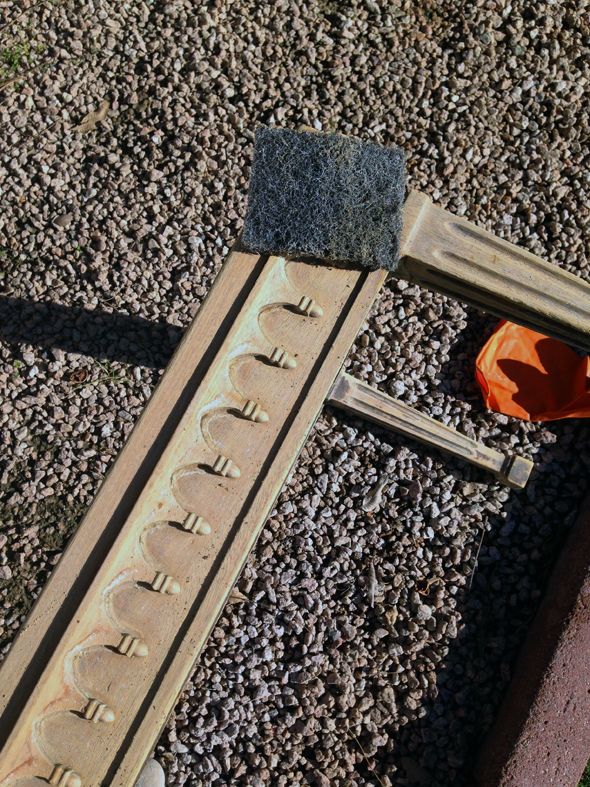
After the wood dried out, we waxed the finish and I LOVE the new color. It's still a little splotchy and dark in some places, but I like it.
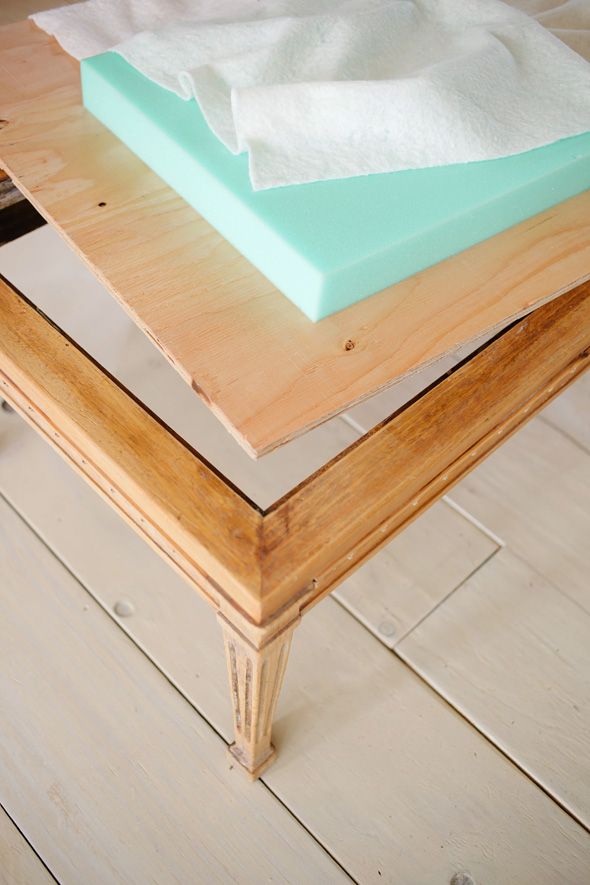
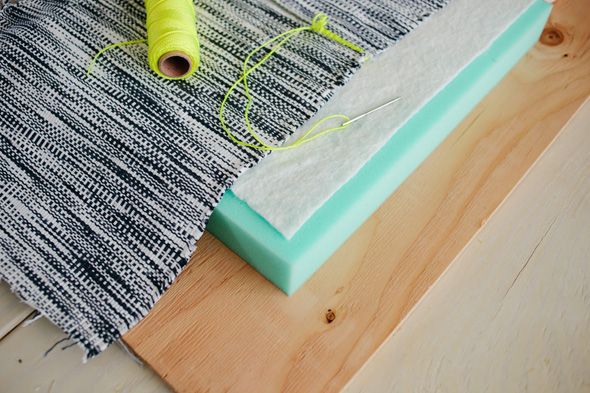
I had some plywood cut to fit the top of the coffee table exactly at Home Depot and bought some high-density foam at Joann's with a coupon, along with some batting cut a few inches bigger than the plywood.
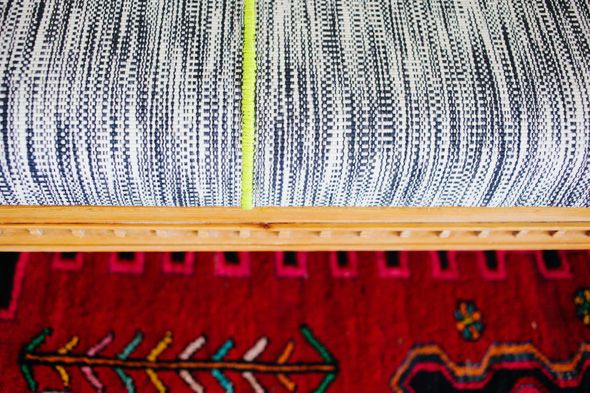
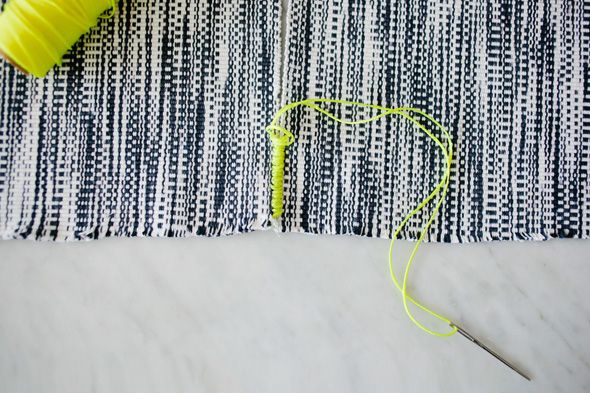
For the second try on the IKEA rug-binding, I did a tight whip stitch instead of the X's, which I think is a cleaner look. I used a large darning needle and some neon nylon thread from the hardware store.
Once the rug (which I had cut into three pieces and stitched in two rows) was finished, I lined everything up and layered the plywood, foam and batting under the rug and pulled everything back as tightly as I could while I stapled.
I stapled down the batting while I went too.

When everything was stapled down, I screwed the base to the upholstered top so there would be as small of a gap between the two as possible.
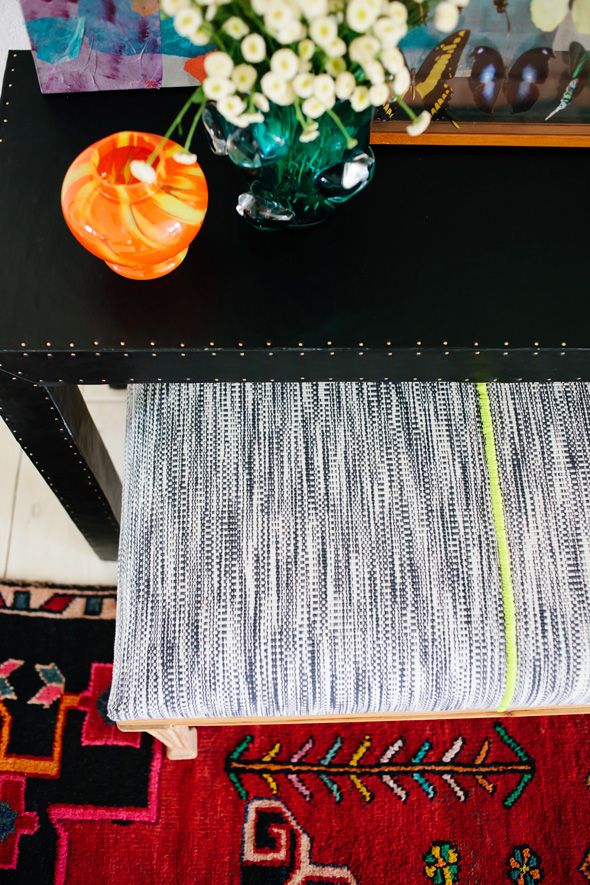
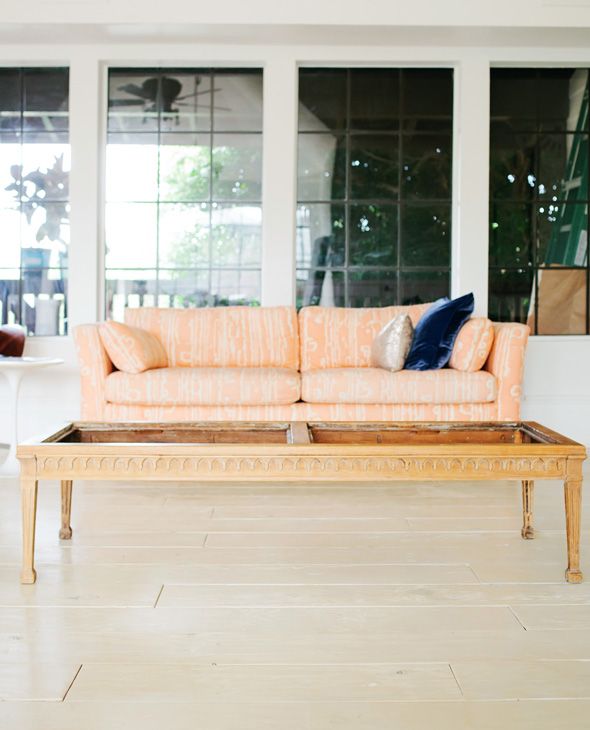
I love how the bench turned out! It was a cheap project and I love how I can use the bench in pretty much any space in the house. I layered it in front of a credenza for the spread and I've used it in our bedroom too. We have been keeping it in the studio lately and I love the little pop of color from the thread. It fits perfectly under this DIY console table that I'll share later this week. :)
A BIG thanks to Michelle Herrick for the pretty photos in this post!
Very nice!
ReplyDeleteOhhh LOVE that pop of neon. Such a HUGE sucker for that lately!
ReplyDeleteWow, you've done a great work with that table turning it into a bench. Looks great and really fits in your interior.
ReplyDeleteUpholstery cleaning Croydon
I really appreciate you for this great information keep it up.
ReplyDeleteLooks amazing! The neon really makes the bench look modern and fun. Thanks for sharing.
ReplyDeletewww.stateofsunshineblog.com
So good!!!! Love the little hint of color.
ReplyDeleteDear Jenny! LOVE this project, and love your blog! I read you every day, and as I make design decisions in my own house, I always ask myself, 'What would Jenny Komenda do...?' I'm wondering if you might remember the name of the color that you painted your credenza (between the two orange chairs in the last photo of your Domino shoot)? I'm looking to repaint a very similar piece in my own house and that color is exactly what I've been searching for. Thank you!!! Anna
ReplyDeleteLove the bench—but I love the previews of your home even more!! Can't wait to see all you've done.
ReplyDeleteLove the neon thread. It really makes the piece more unique
ReplyDeleteCongrats on your feature in Domino!
ReplyDeleteYou totally deserve it with this stunning transformation- I'm swooning over the neon pop too!!
Jenna
http://pizzigatidesigns.tumblr.com/
I love how you mix textures and patterns...it is like it is second nature to you. I love your sense of decorating style!
ReplyDeleteAbsolutely gorgeous. What a find! And the pop of neon is a stroke of genius.
ReplyDeleteI love this idea, the finished product is beautiful. I'm just wondering why you cut the rug in thirds and then stitched it instead of just doing the decorative stitching? Wondering if cutting it would compromise the strength of the fabric making it more prone to separating during the upholstery process. Love your posts and ideas, you are an inspiration!
ReplyDeleteI didn't know there was such a thing as wood bleach! And you are just genius to do the whipstitch in the bright color. Love this bench!
ReplyDeleteI'm so glad you wrote up this tutorial. I have a coffee table that I've wanted to lighten so I will follow these instructions! I love how your bench turned out. Every project you make is beautiful.
ReplyDeleteWhat a fun project!
ReplyDeletebreathtaking and genius, like usual!
ReplyDeletex Lily
http://whilemyboyfriendsaway.blogspot.com/
It looks great! I love how you took a table that no one else sees value in and made something so wonderful. Thanks for the inspiration!
ReplyDeleteLOVE, LOVE, LOVE! This might be my most favorite thing you've done. And I love a lot of what you've done.
ReplyDeleteLove the neon pop!! Amazing job as usual. I'd love to try this out. Also, I have been on the hunt for a console table and I am anxiously awaiting your DIY post!
ReplyDeleteadd me to the love it column. that is a great diy. that neon seam is a great touch.
ReplyDeleteThis was such a fun spread in Domino and I loved seeing more details here. The neon thread was a genius addition. It looks so good with the ikea rug. Great job!! xx
ReplyDeleteDivine result and clever transformation! The ability to 'see'beyond what's there in front of you and what could possibly be, is a gift!
ReplyDeleteSuch a great upgrade and I love that fabric!
ReplyDeletexx Lexi, Glitter, Inc.
This comment has been removed by the author.
ReplyDeleteLove this and ALL your projects! Can you tell me what brand/type of waxed finish you used? Thanks Jenny!
ReplyDeleteHonestly, you're amazing. You make me look at everything I see in a different light. I love how you see the potential in so many things. Thank you.
ReplyDeleteBravo! Happy Nesting!
ReplyDeleteAwesome! Silly question - How long were the screws that you used to screw it into the base? I feel like I missed it somehow?
ReplyDeleteI love tea table and chairs, the feel of the worn weathered leather is so so different to new......& I spend ages restoring new leather chairs..
ReplyDeleteModern Dining Table and Chair
This project is right up my alley! It's pretty neat how some of the best results are from pieces of furniture that looked like they had seen their best days. Thanks for the inspiration!
ReplyDeleteI have a nearly identical coffee table (it hada a marble top) that I've been wanting to turn into a bench. Thanks for the inspiration although I might go for a glossy paint job instead of bleaching.
ReplyDeleteI immediately scrolled back to find out what fabric you used. An Ikea rug with neon stitching added. BRILLIANT. It is so awesome.
ReplyDelete